

Running Microsoft SQL Server in a Docker Container on your local machine - Mac
We'll run through how to setup and run SQL Server on your local machine using Docker and the steps to get it up and running


You don’t always want to be connecting to an online database when building web applications as a developer. A lot of the time you have test data or a dummy database that you connect to with your resources.
What we’re going to do here is run through how to setup and run a Microsoft SQL(MSSQL) Server on your local machine using Docker and it will be running within a Container for you to access within your applications on your Mac.
I just want to emphasis, this is a guide to have it running on a Mac OS, other systems are similar, but I’m just highlighting that.
Now to get started, you’ll need to download and install Docker Desktop if you haven’t already got it:
The details I’ll go through in this post are:
Open Docker Desktop and Pull the Docker Image
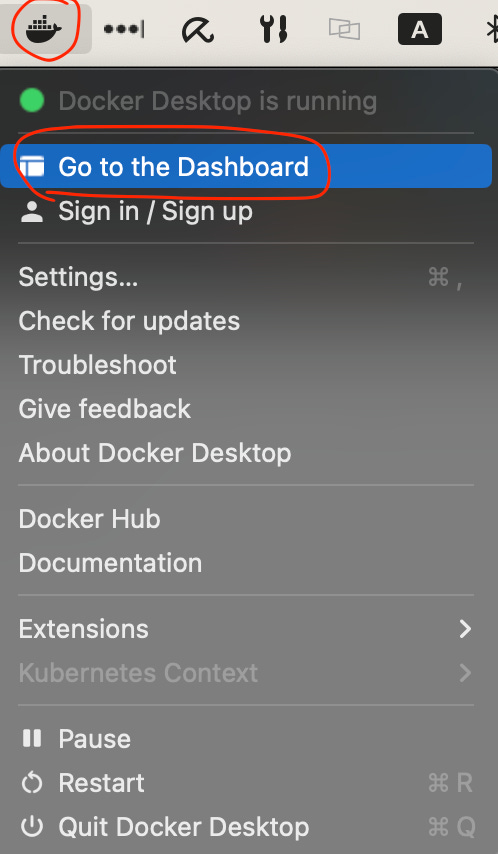
Now that you have the Docker Desktop application running it should be displayed in your applications in the top bar, let’s open the dashboard by clicking the icon and selecting Go to the Dashboard
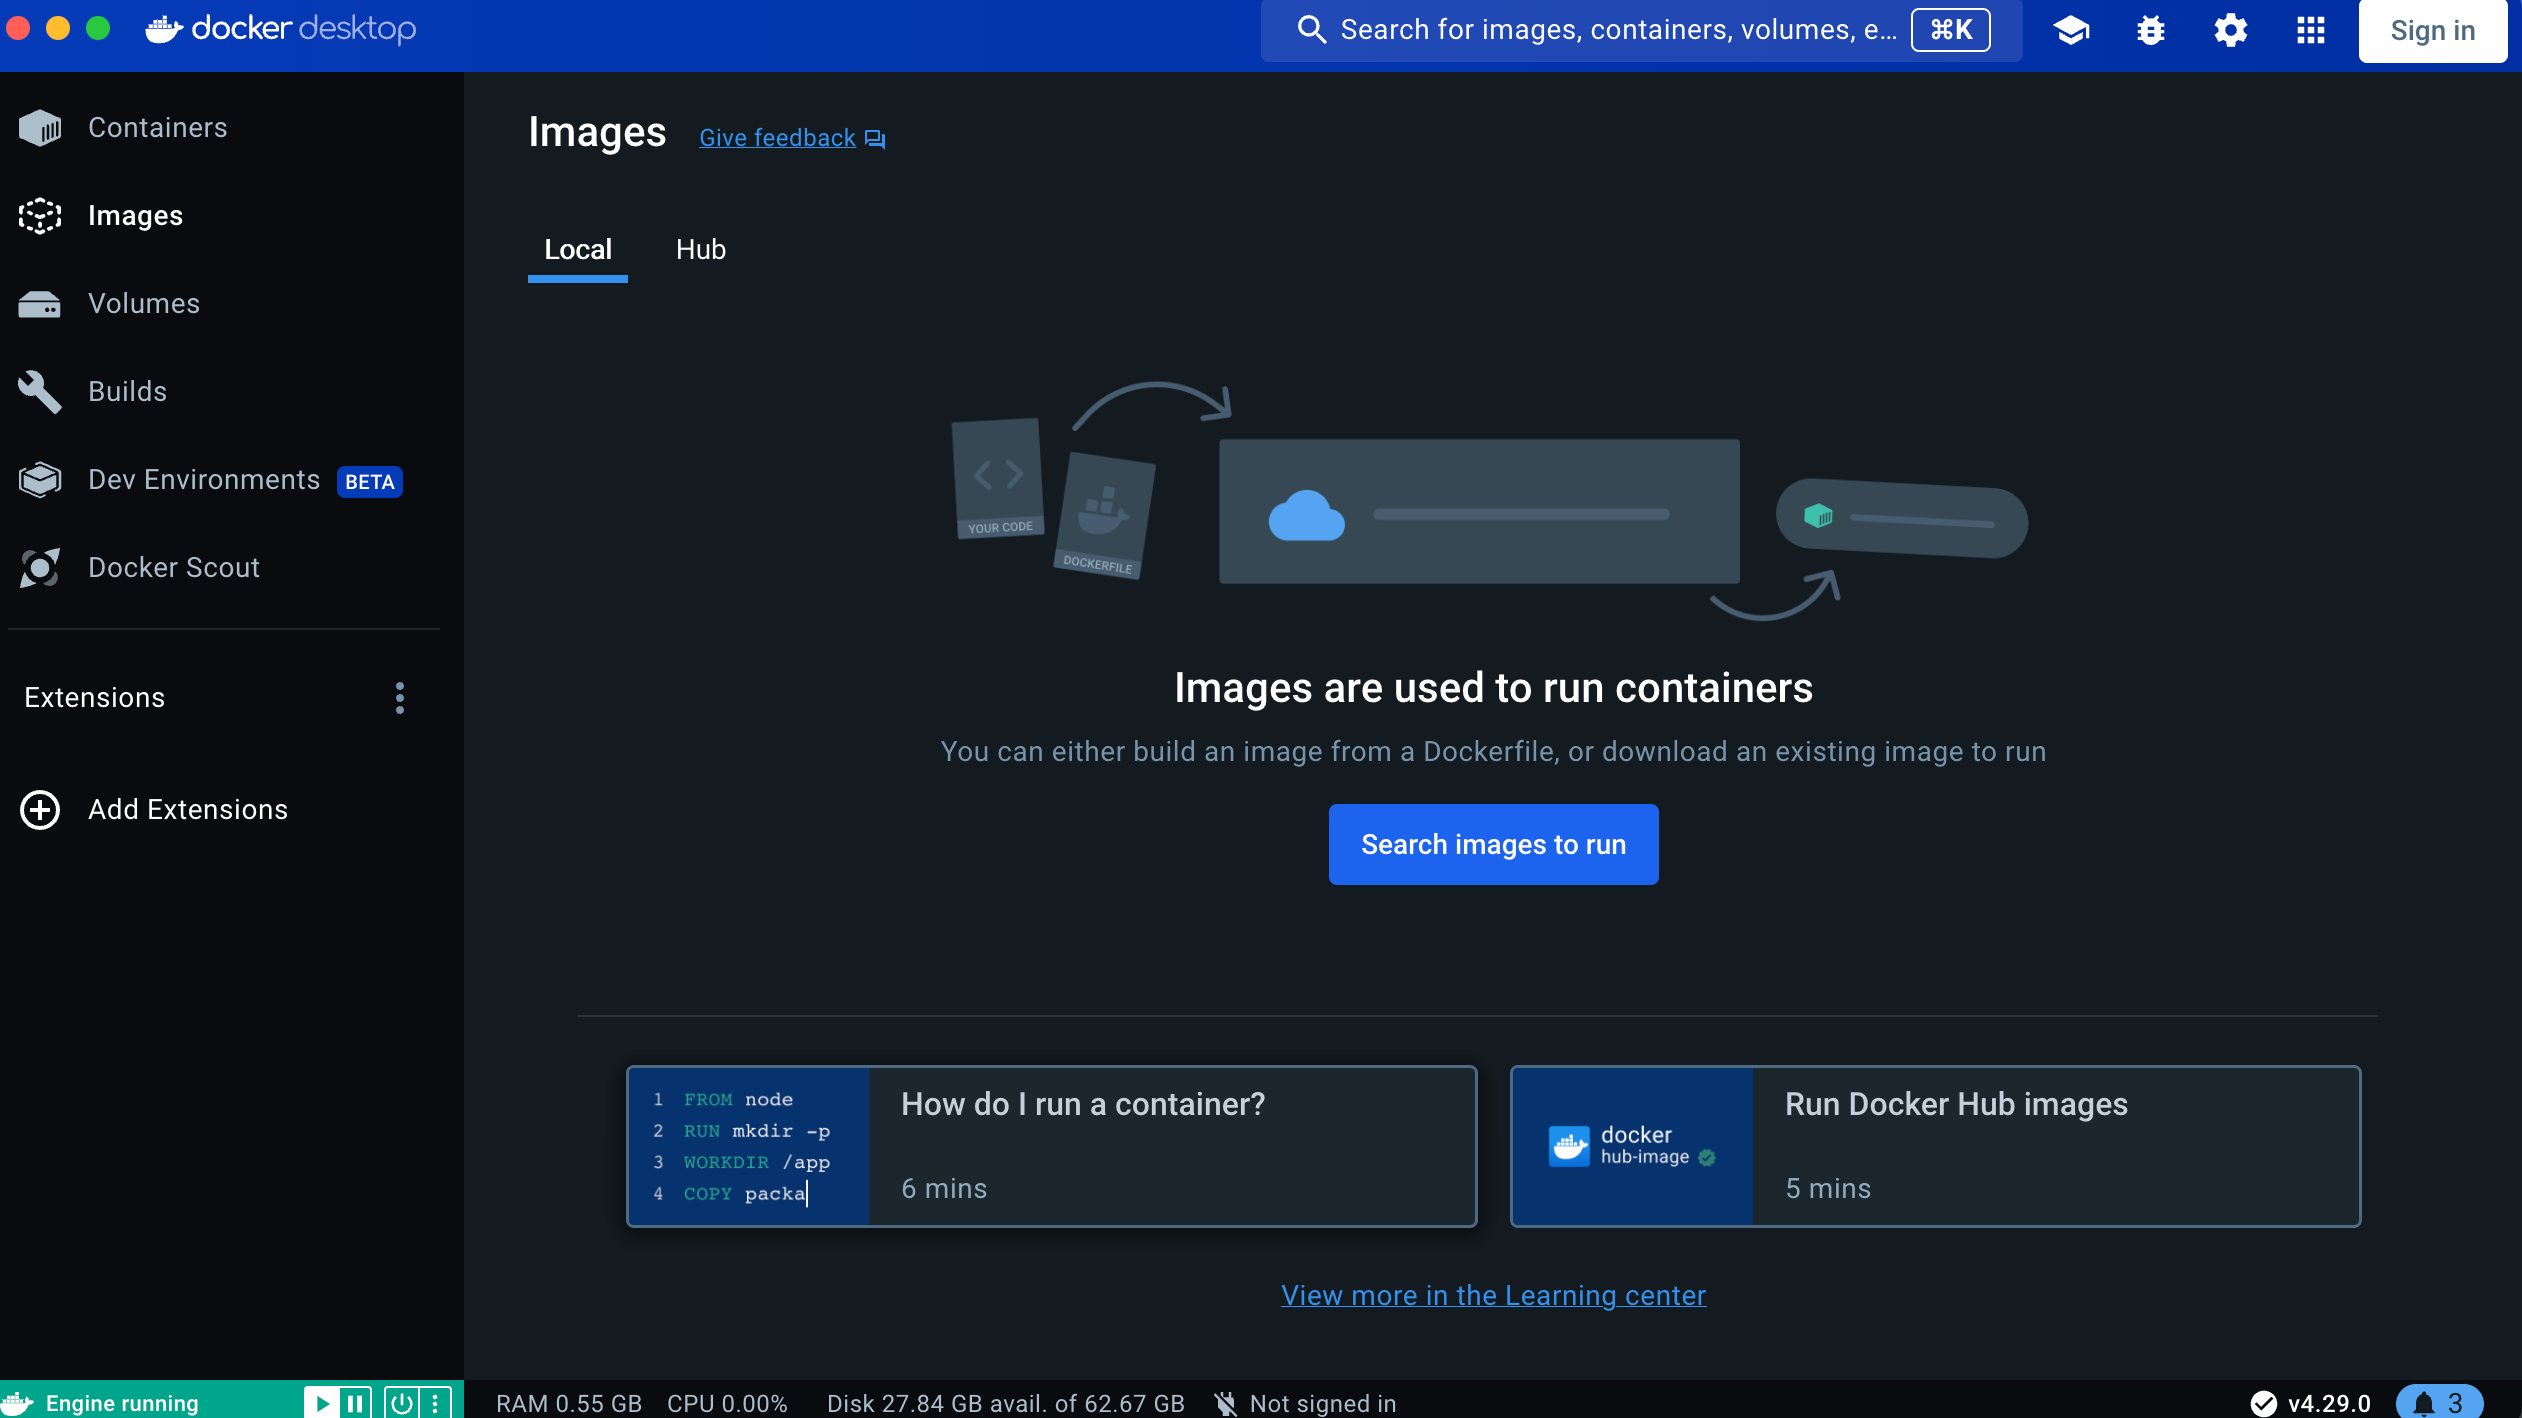
Once the dashboard is open, click on Images and we can see that there is nothing there yet. The images is where the skeleton of the Docker building blocks are stored, it’s the image of the application.
Now we need to open our Terminal so we can Pull down the MSSQL Server image which we can use to build and run the container.
The Terminal is the command line interface that’s built into all Mac OS systems, so if you search for it in your apps it will be there.
Once your Terminal is open, we need to get the image by running the below command:
sudo docker pull mcr.microsoft.com/mssql/server:2022-latestIt may ask you for your Mac password to give access to run it using sudo (pretty much admin command authority).
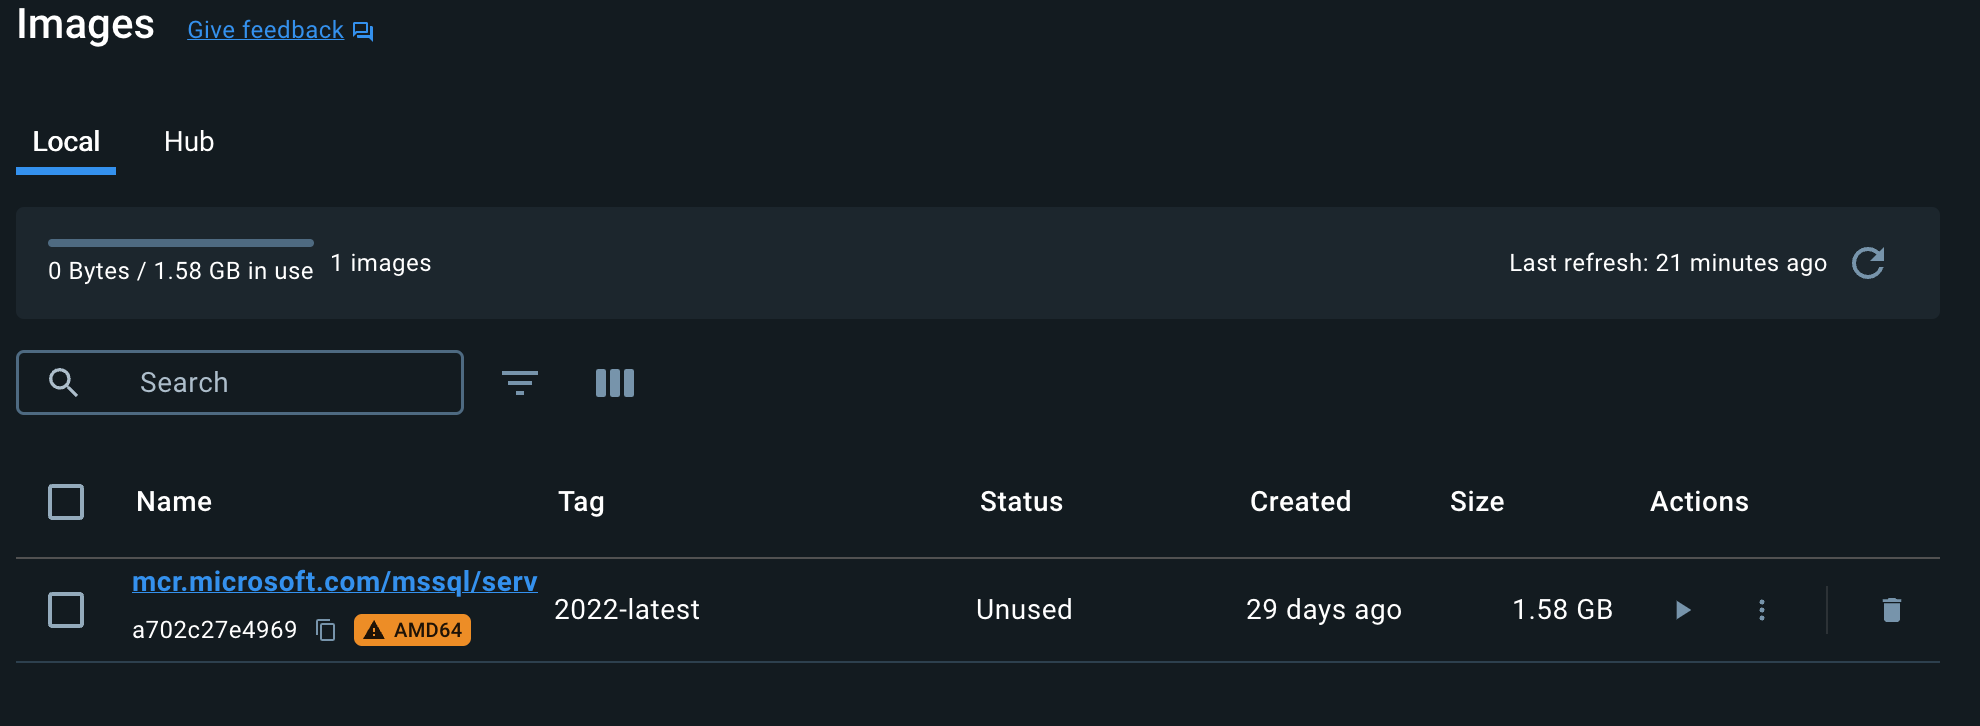
This will get the latest of the 2022 version of the MSSQL Server, while it’s running it will show the download progress

And once completed it will return to the command prompt, show the status as downloaded and when going back to the Docker Desktop app you will be able to see the image in the image section:
Running the container
Now we have the image for the MSSQL Server, but now we need to run it, in order to run it we need to pass some variables into it via a command line through Terminal again that will:
Accept the required MSSQL user agreement
Set the password for the System Admin(sa)
Open the ports to be accessed (MSSQL is set to 1433)
Name the container
Link a folder with your computer (This is handy for saving and restoing database backups)
Below is the command to run, make sure you adjust everything that is in the arrow brackets with your own personal details (i.e. <hostname> you can change to something like mssqlserver)
sudo docker run -e "ACCEPT_EULA=Y" -e "MSSQL_SA_PASSWORD=<password>" -p 1433:1433 --name=<name> --hostname=<hostname> -v </path/to/your/local/mapped/folder>:/var/opt/mssql/data -d mcr.microsoft.com/mssql/server:2022-latestAfter running the above command, you should be able to see your container running in the Docker Desktop application under Containers.
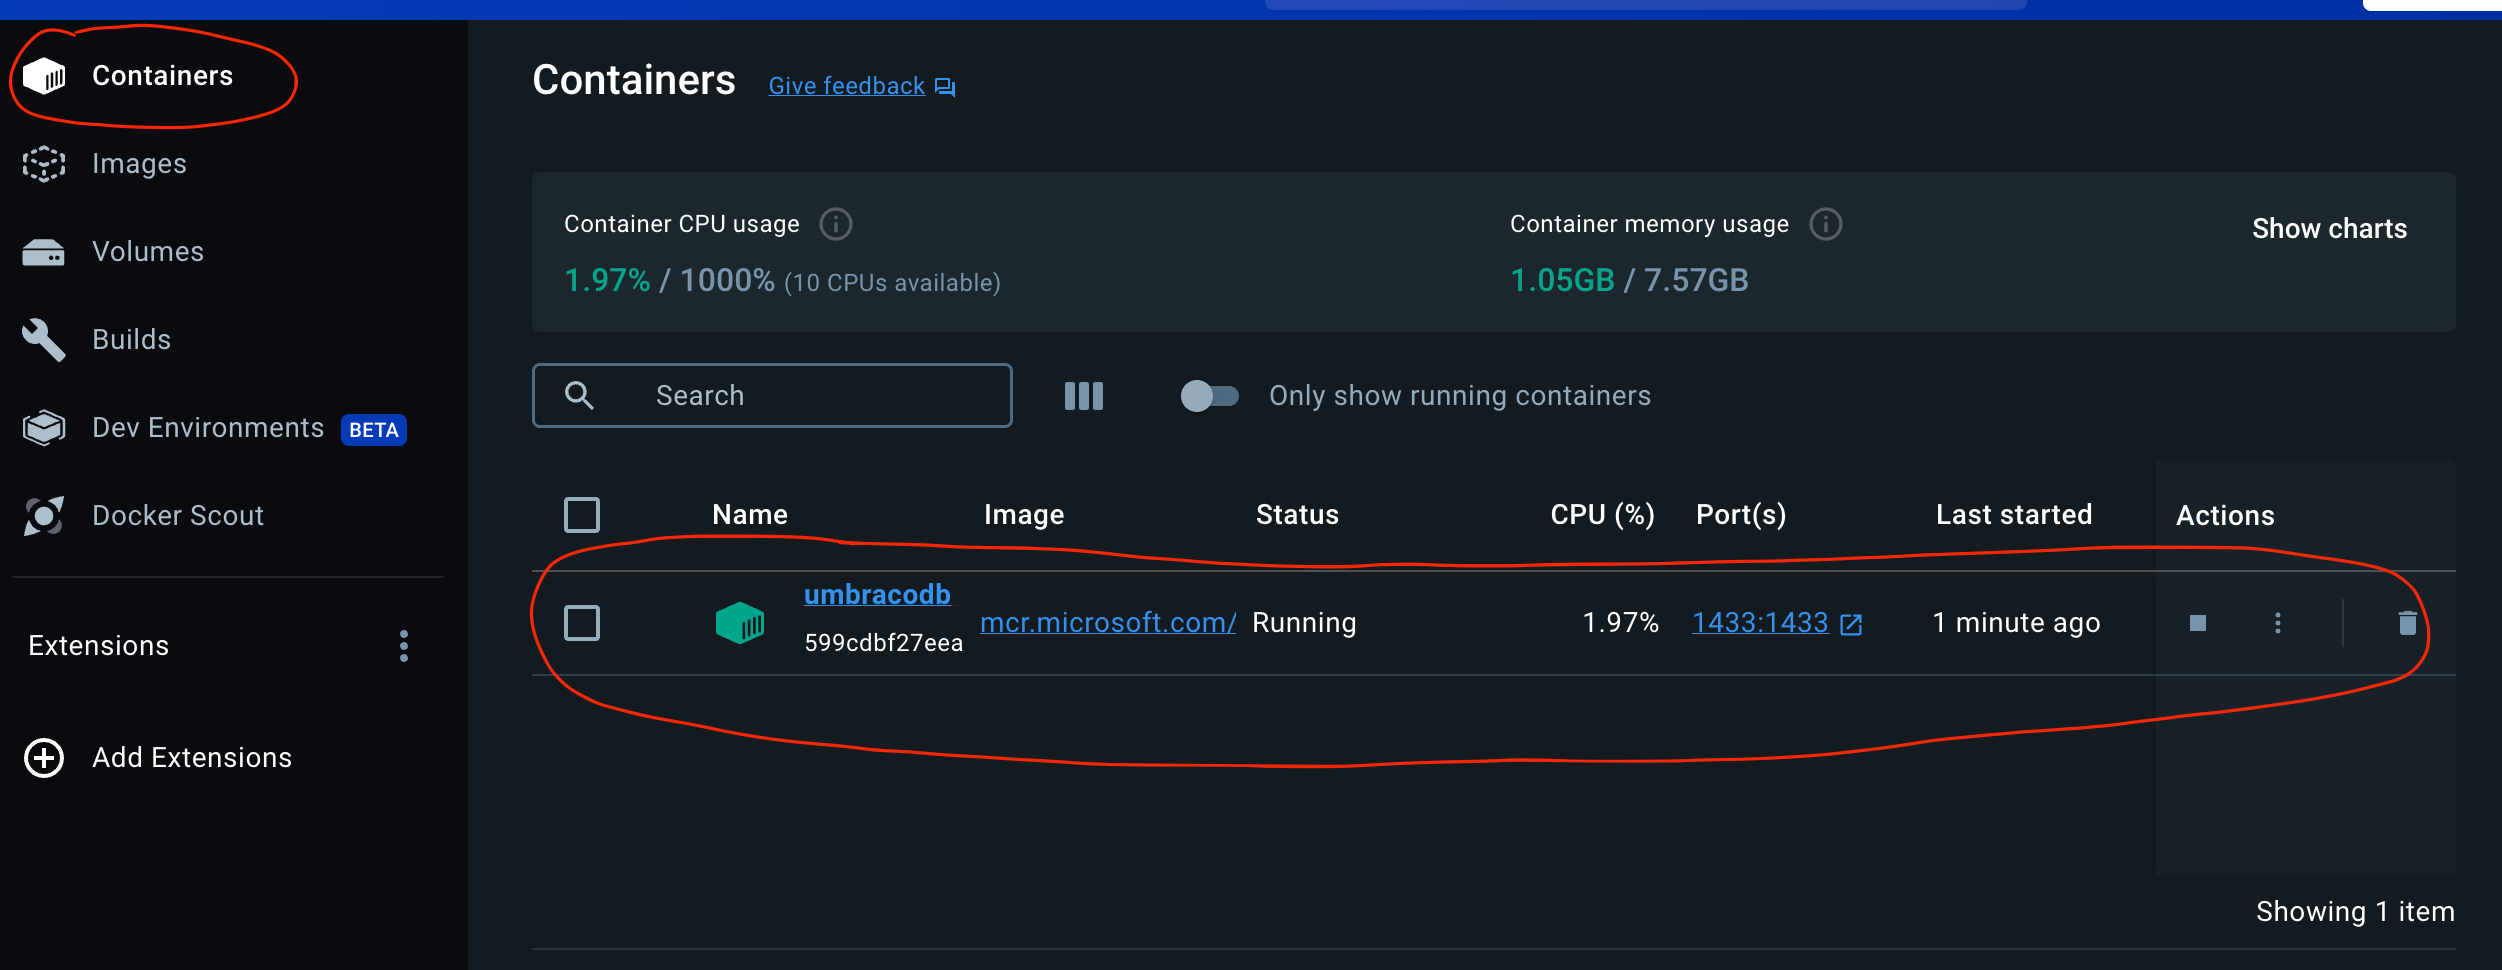
*NOTE: If the container stops running or Docker is stopped and started again, under the Actions section, there is a stop and play button you can turn the container on and off with.
Accessing the MSSQL Server
Great! Now we have the container running and it’s all done and fine, right?
Well, we need to access it and also, there’s no databases on the server yet, it’s just a server instance.
So we need to log into it and then create a database that we can access and use. The container by default runs on the local instance, so http://localhost and the port it’s running on is 1433 which means we should be able to access the instance using the password we entered before to run the container and the system admin details.
This means the details to login would be:
Server: https://localhost:1433
User name: sa
Password: The password you used for the container running command
So with these details we should be able to login to the server.
On my Mac I am using Azure Data Studio to access the MSSQL server instance, but you can use your preferred software, for full options it’s best to use Microsoft SQL Server Management Studio (SSMS) but that is only available on Windows devices, but Azure Data Studio is still fine for what we need.
links to these resources are below:
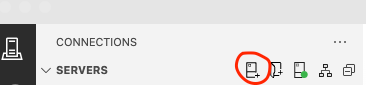
Once you open Azure Data Studio, under the connections, click on New connection and it will popout with the details required to connect to the server.
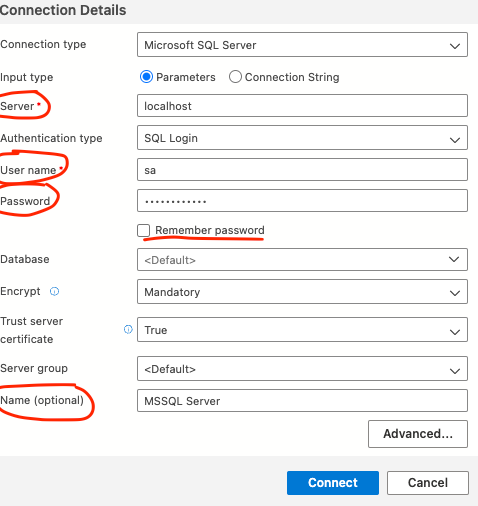
And under the connection details, fill out the required fields with the details you we mentioned before
Server: localhost
User name: sa
Password: The password you used for the container running command
And I’d probably suggest adding a Name even though it’s optional, it just makes it easier to read in the side menu where it lists the servers.
Keep everything else as it is, apart from Remember password, if you don’t want to type the password each time, check this box too.
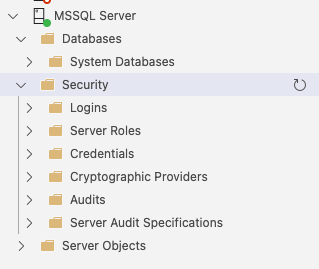
Now once you click on the Connect button, this will load up the server for you with all the initial system required details and default system databases.
Creating a database
WE have successfully setup the server to run on our local machine, now we need to add a database to the server which is what the applications will connect to.
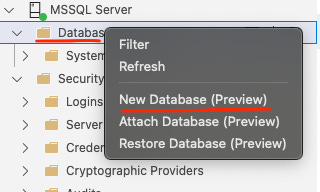
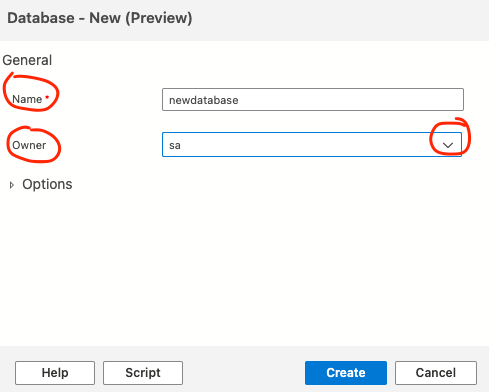
If you right click on the Database folder, this will display the popup menu, here you can select New Database
This opens the new form from the side where you can enter a Name for the new database and the Owner for the database. I’ve just selected the dropdown menu and chosen sa for now, but you should create a new user that has specific privileges for this database usage based on what application is using it to limit access rather than giving full system admin access.
But this should be fine for now for our local test example:
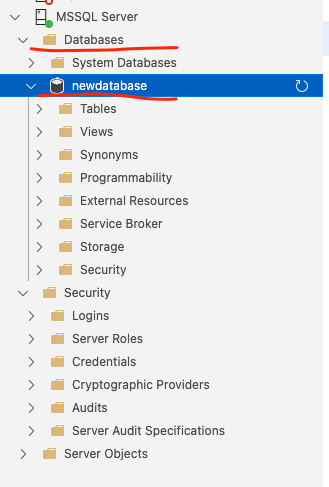
Once you click on Create it may take a minute for the database to be created, but once done it will display under the Databases folder:
Accessing the database
Ok, so we have it all up and running locally with Docker, the server and now a new database!
So how do we access the database directly?
Well, you can do it of course using a Graphical User Interface(GUI), like what we are doing with Azure Data Studio and we can run SQL commands to get what we want or enter tables and data in, but we want to access it with our programs and applications, right?
So for this we need to get all the details required to make a connection string, or depending on the resource your using to access it, you just need the credentials.
These details would be pretty much what we highlighted before:
Server: localhost
User name: The username of the user that has privileges applied, in our example that would still be sa as we didn’t create another user
Password: The password for the user that has privileges, in our example we are using the same as sa so it would be the password we used in the run container command
Database name: the name of the database we want to access on the server
Now the reason I’m saying it’s good practice to make a specific user that is used for a database, is because that user won’t have admin level access and will only be able to access a specific database.
Let’s say you have multiple databases on the server, we don’t want all users to be able to access any database, just the one it needs to. In this we didn’t go through creating Login users, but that may be something to look at down the track as it’s not quite required for a local setup.
Conclusion
By stepping through these steps you should now have a MSSQL Server running on your Mac that has a database attached. With this you can link your applications and resources that require a SQL database, which will allow you to restore and backup data to and from it also.
We didn’t go through the restoring or backups of the database, that is for further guides, I just wanted to get the basics of setting up a local MSSQL database on your machine.
Anyway, happy databasing and catch you next time :)