

Setting up a Containerised Microsoft SQL Server on Digitalocean Docker Droplet
A short guide on setting up a Microsoft SQL Server using Digitalocean's Docker Droplet


Microsoft SQL Server is a relation database service and is usually hosted and maintained within the Microsoft ecosystem…which can cost a bit of money. However, thanks to Docker and containerisation, we can create our own hosted Microsoft SQL Server within a container that is also scalable thanks to Digitalocean.
Here we will go through:
A few things to point out though:
By having the server containerised and running in a Docker environment means that you will be fully managing the service. This means that you will need to keep upto date with all security and system updates of the server
If it is hosted in it’s own service, such as in Azure, then Microsoft manages the infrastructure so you don’t need to worry about any maintenance, however there is of course a fee associated with the service which can be quite high.
This guide runs through how we can get this service up and running on a Digitalocean Droplet
Prerequisites
This is assuming that you have created a Digitalocean account and a project within Digitalocean, if you haven’t now’s the time to create an account and a project:
Create a Docker Droplet
Once logged into Digitalocean, select the Droplet menu item

Click on Create Droplet

This will take you to the Droplet creation screen where you can complete the fields:
Region - Choose your preferred region (keep in mind if you have multiple droplets and you want them to talk to each other they all need to be in the same region/Datacenter
Choose an image - Select the Marketplace option and then choose the latest Docker image

Choose size - Select the size of the droplet, you can choose the basic and smaller regular option, as long as it has a minimum of 2GB memory, if you choose anything less, the server will not start. This is also upgradable as your needs increase down the track

Choose authentication method - It’s recommended to setup an SSH key and use that to login via the console as there will be a bit of commands and is more secure. If you have a key already created then you can select that, otherwise click on New SSH Key and follow the instructions to create a new key.

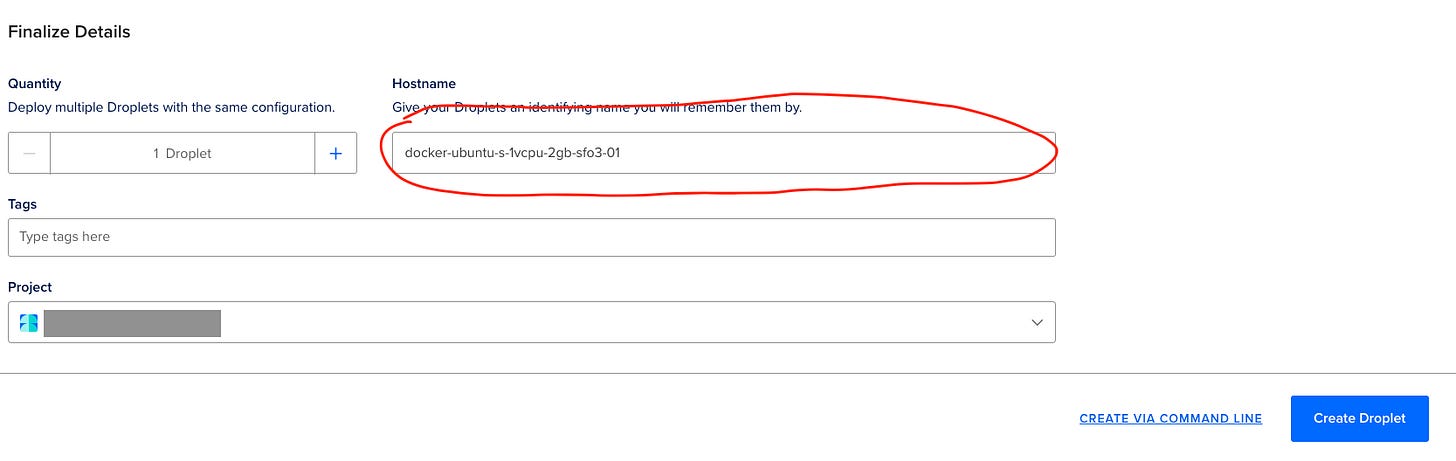
Finalize details - You only need a single droplet for this example, update the name to a preferred name and then click on Create Droplet and then wait for the droplet to build and be available
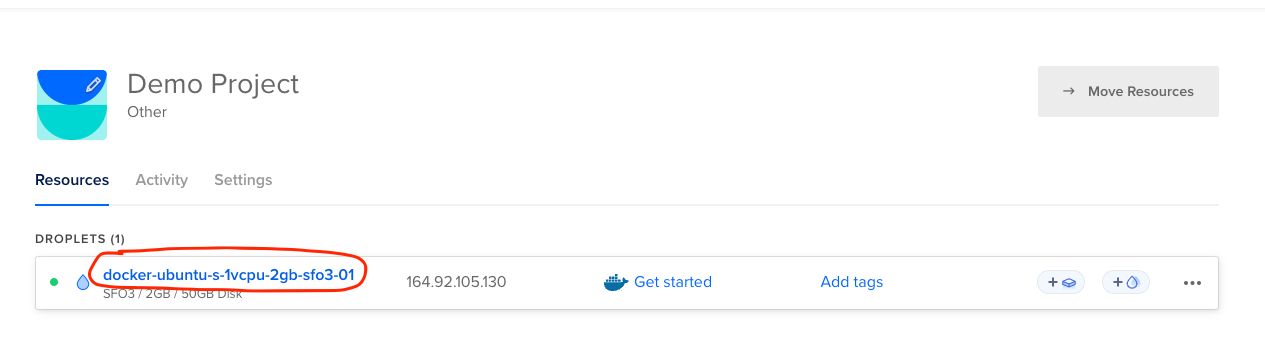
Now the droplet should be created in your project, select the name of the droplet to open it:

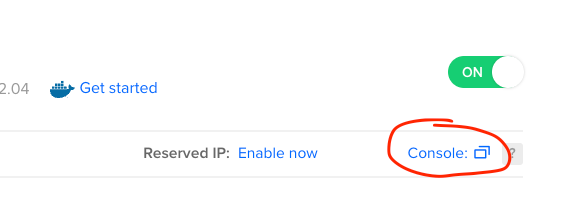
This will open the Droplet and a few areas to keep in mind of:

Power switch - this turns the droplet on and off (You will still be charged if the droplet is powered off
ipv4 address - this is the ip address to access the server
Private IP - if you have another droplet on the same region and datacenter you can use the private ip address for them to talk to each other
Console - this opens a terminal as the root user to manage commands and access the server drive and content
Access the server from your local machine via the command line if you’re not using the browser based console from above. I’m using mac so I can access it through Terminal using the command:
ssh -i {path-to-private-key-on-your-computer} root@{ip-of-the-droplet}so it would look like:
ssh -i /path/to/ssh/key root@164.92.105.130


Create and run the SQL Server Container
This section has a fair few command line interface (CLI) commands to run so let’s follow each step and make sure the server starts up, remember, if you get stuck at any point, you can easily delete or Destroy the droplet and start again.
*NOTE: This section assumes you are logged into the server via a console or terminal as root user to execute these commands.
We need to pull the docker image for the mssql container and you can find the latest from the Microsoft website here
sudo docker pull mcr.microsoft.com/mssql/server:2022-latest
Next we want to create a folder on the host that can directly link to the container, this is helpful if we need to transfer anything between them such as restoring backup databases from a backup file.
mkdir /sql_backups
Now we can run the container with the below command, feel free to edit the name, password and hostname to what you prefer:
sudo docker run -e "ACCEPT_EULA=Y" -e "MSSQL_SA_PASSWORD=password" -p 1433:1433 --name=containername --hostname=containername --user root -v /sql_backups:/var/opt/mssql/data --restart=always -d mcr.microsoft.com/mssql/server:2022-latest
Accepts the required agreement for Microsoft SQL Server usage
Sets the admin password - Make sure it is following the standard password requirements set by Microsoft,
Sets the ports for the database
Sets the name of the SQL Server
Sets root as the user (can have issues writing if not - may be best to adjust and create another user in a proper scenario)
Maps the sql_backup folder on the host to the data folder on the container
Will always restart and turn on the database when there is a restart for some reason
Check the container is running:
docker ps -a
if the server is doesn’t have the Status as up then you can check the logs and see what is happening by running:
docker logs containername


Running a Script to Configure the Container
Ok, so if you want the easy way out, you can just run this script I’ve created instead of stepping through the commands to create the container.
It will prompt the user for the password and the container name and then it will run through the commands.
If the docker container is NOT running, then it will automatically run the logs command to display what’s going on.
To get this to work:
open the console of the Droplet after it’s been created to open the CLI
Once loaded run the editor:
nano setup_script.sh
This will open the CLI editor and then copy the below code and paste it into the editor:


#!/bin/bash

# Prompt the user for the password and name
read -p "Enter the password: " password
read -p "Enter the name: " name

# Create a folder for SQL backups
mkdir /sql_backups

# Run the Docker container
sudo docker run -e "ACCEPT_EULA=Y" -e "MSSQL_SA_PASSWORD=$password" -p 1433:1433 --name=$name --hostname=$name --user root -v /sql_backups:/var/opt/mssql/data --restart=always -d mcr.microsoft.com/mssql/server:2022-latest

# Check the container status
docker ps -a

# If the container is not running, show the logs
status=$(docker inspect --format '{{.State.Status}}' $name)
if [ "$status" != "running" ]; then
    echo "Container is not running. Showing logs:"
    docker logs $name
fi
Now save the editor content
by pressing control + x together
It will look like nothing really happened, but at the bottom of the screen it will look like Y to confirm, N for no and C to cancel, so push Y and then Enter which should then take you back to the home folder.

Now we need to make the file executable so we can run it by entering:
chmod +x setup_script.sh
And now we can run the script to setup the container
./setup_script.sh
Follow the prompts and enter the password and name and then it will run all the past commands to set everything up


Connecting to SQL Server
To connect to the Microsoft SQL Server you can use multiple programs, such as:
As I’m on a Mac, I’m going to be using Azure Data Studio to demo connecting.
You can download the software from the above links.
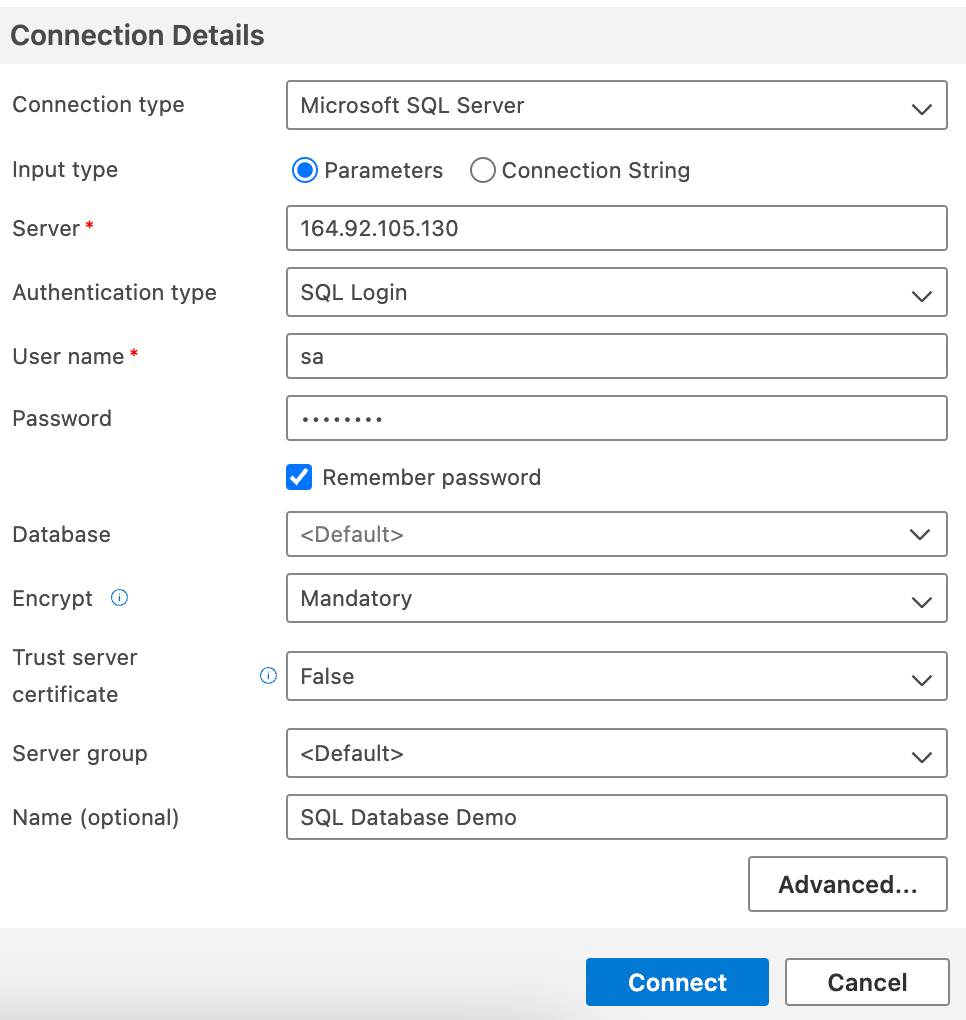
Open Azure Data Studio and click on New Connection

From here you can enter the details of the server we created in the last section

Server - the ip address of the Droplet
User name - the name of the admin user which by default we have used the System Admin so the user name to start will be sa
Password - The password we used in the command to create the docker container
The rest can be left as default settings, if you want you can put a display name under Name (optional) to make it easy to show in Azure Data Studio and then click on Connect
A popup will most likely display with a trust certificate request, click on the option to enable the trust certificate

And there we go, we have the server running, but there are no Databases on it yet apart from the default system databases. From here we can create databases on the server and add users, etc. That will be in the next article, but at least you now have a running online SQL server that is also scalable when required.


How can I Scale the Droplet?
If you need to increase of decrease the droplet at any time with memory or space you can go to the resizing option and select the size you want, and you can go up or down.
If they are greyed out, then it means you can’t choose those options for some reason, size requirements of the image, etc.
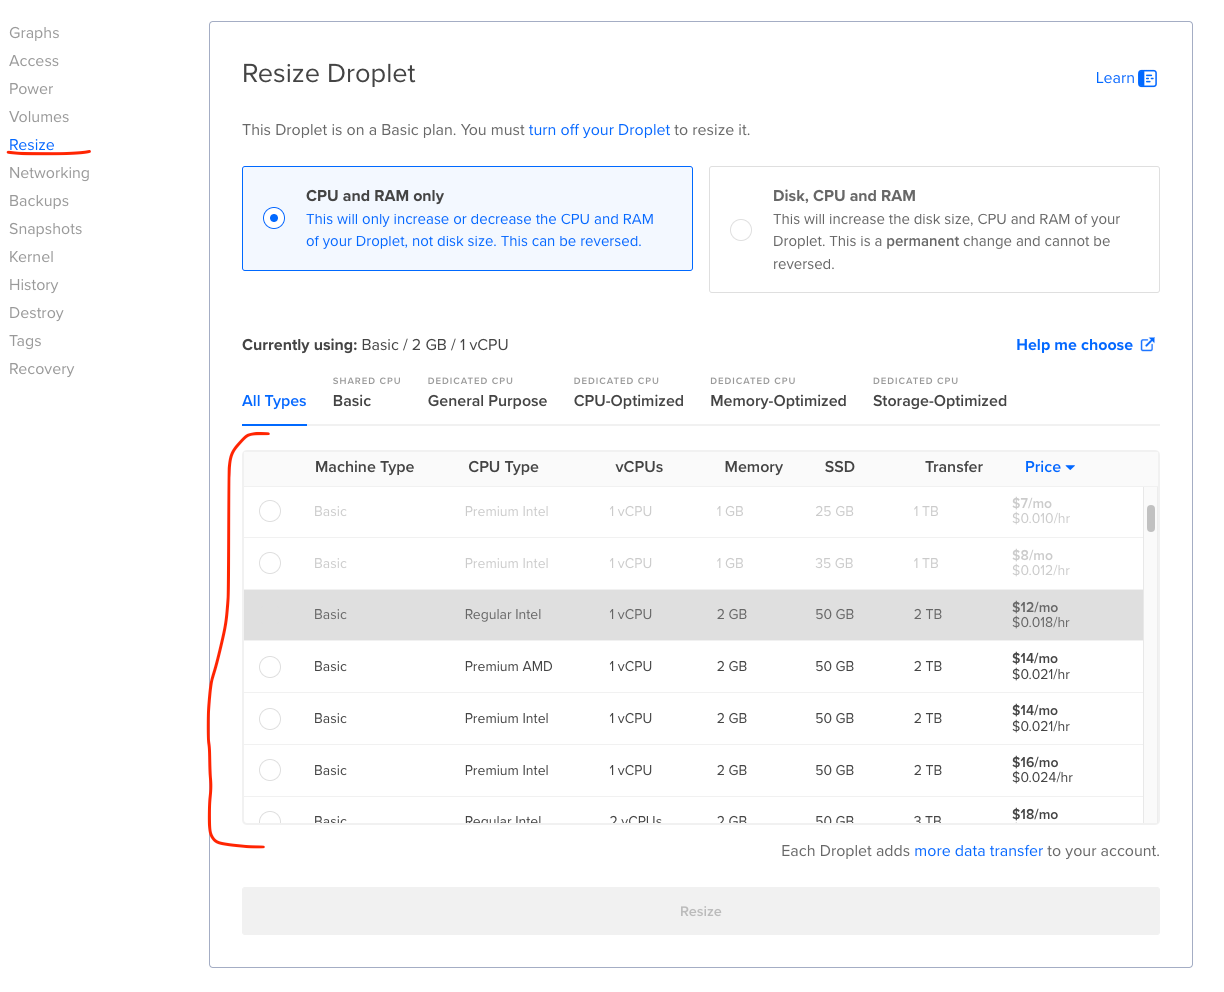
*NOTE: If you increase the SSD size then you can’t drop that back down, that can only go up in size.
Next Steps
This should now have the Microsoft SQL Server running on a Digitalocean droplet where you can access the instance running and will be available on port 1433 on the ip address the droplet uses and is created on.
Now that we have it running live, there are a few steps that we still need to do and will be covered in the next guides:
Create a Database on the Server and non-root User Access
Automated Database Backups to AWS S3
These next steps will be coming soon…