

Setup new Umbraco 13 CMS solution on your machine - Mac
Here we'll go through how to setup a base Umbraco CMS solution on your Mac with just the basic configurations from scratch


Umbraco CMS is a flexible and scalable CMS built using the .NET framework. I’ve previously written up about the features that Umbraco CMS has in this article: Umbraco Content Management System (CMS) - What is it?
My setup is all on Mac OS systems, so I’ll run through how to setup Umbraco on your local Mac as well. We’ll start from the basic install and work to get the system running on your computer in both the Development and Production environments.
The reason we want to have both functioning is so you can test both for when you have them deployed to a server. With Umbraco, all the model editing and template changes are done within the Development environment and for the Production environment these features are disabled. This means we want to make sure that they are both working for our deployments.
The details we’ll go through are:
Let’s get started with this shall we…
Install the latest .NET SDK
The first step is to make sure you have the latest .NET SDK installed on your machine so you can run the required resources and code.
You can download the latest SDK from the below link:
Select the version for the Mac that you’re on, run it and follow the prompts to install the required resources.
Install Umbraco Templates
Umbraco has it’s own NuGet package of templates we can install using dotnet to install them and by running the below command it will install all the Umbraco resources globally.
Open your Terminal window and enter the below command:
dotnet new install Umbraco.TemplatesOnce this has run and installed the packages you can check they have completed successfully by running:
dotnet new --listAnd it should bring up a list of templates and the Umbraco templates should be visible.
Create a new Umbraco Project
Once we have the templates installed we can create the project and test that it’s running.
Navigate to a folder where you want the project to created and open Terminal in that folder, then run the command to create a brand new blank Umbraco Project, make sure you change the name of the project to what you want to call it.
dotnet new umbraco -n YourProjectNameThis will create a blank and empty Umbraco project for you to work on, so within the current folder, let’s navigate to the project files of the newly created folder.
cd YourProjectNameNow you should be able to build and run the project in the default debug template state:
dotnet build
dotnet run
After running the solution it will build the project and then in the Terminal it will display the port it’s running on and the environment.
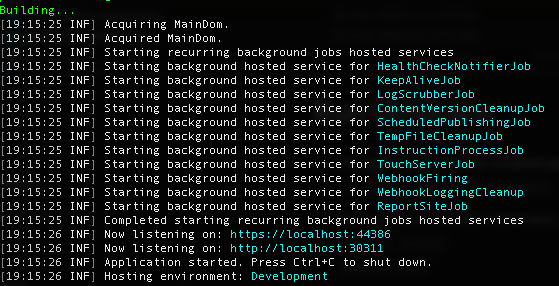
It will choose a random free port so it won’t always be the same with each project so yours will most likely be different to this, but from the output we can see that:
The application https is running on https://localhost:44386
The application http is running on http://localhost:30311
It is currently running on the Development environment
*NOTE: When closing the Terminal window or pressing Ctrl+C it will stop the running instance.
Configuring the Database
Umbraco can run using either a simple SQlite database or a SQL database on an SQL Server.
The SQlite database is run within the application so should only be used for testing and development related work as it’s tied in with the application which limits it’s scalability and efficiency.
The SQlite database, is the default inital database that it will start with unless an external database is selected.
You can configure the database when first running the Umbraco application as one option, but you can also configure the database in Environment Variables so you don’t need to run through the setup and can change the string by rebuilding the app and just changing the environment variable. On top of that, if you have an umbraco database that is already configured, but using the environment variables, it will start the umbraco project as normal and not run through the setup wizard.
We’ll go through both the options, configuring through the Umbraco setup screen as well as through Environment Variables.
Option 1: Configure database through Umbraco setup screen for initial setup
*NOTE: If you’re using the local SQLite option for setup, this is probably the easiest way to configure the database quickly.
In your terminal make sure that the application is running. Open the Terminal in the folder that the Umbraco application is stored, then build and run the solution:
dotnet build
dotnet run
Navigate in your browser to the url that it’s listening to, this will be displayed in the terminal like we showed before, so in my example it’s https://localhost:44386
This will take you to the initial setup form, fill out the admin details
Name
Email
Password
Set the Consent for telemetry data (i have it to Minimal
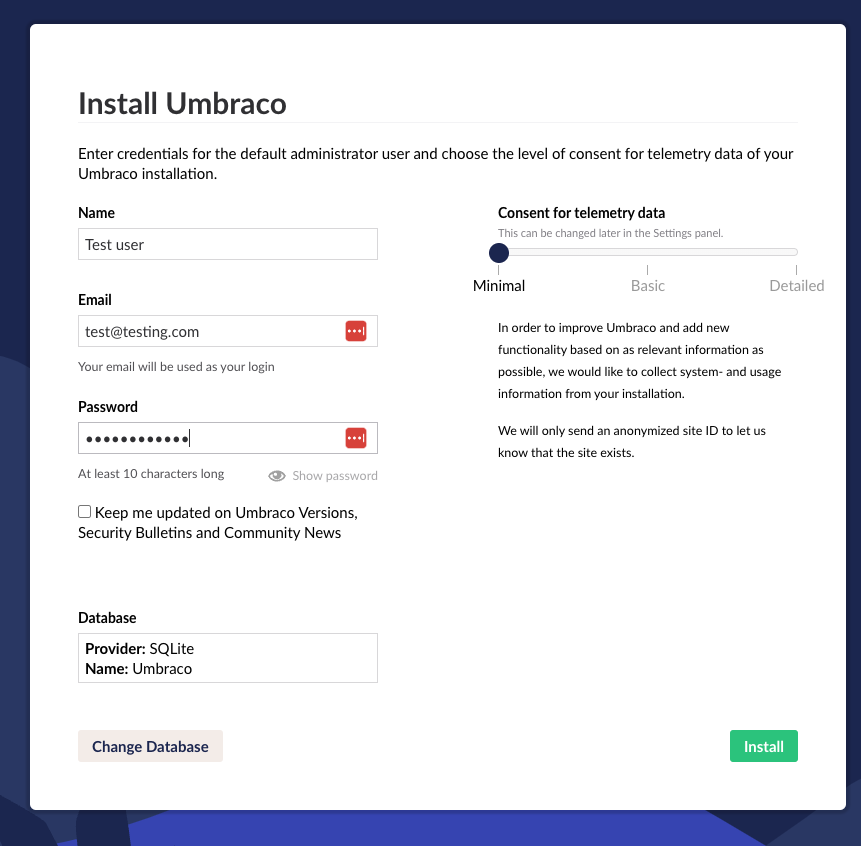
By default it has SQLite as the initial database, you can change the database settings here by selecting the Change Database button
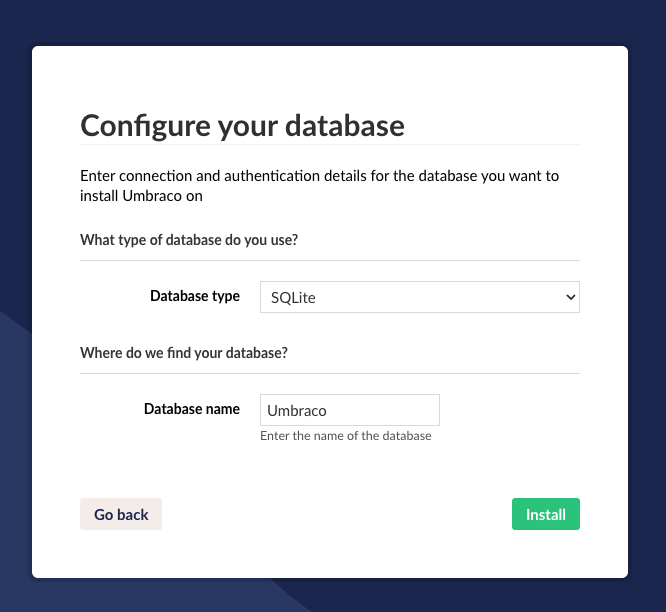
Each option has it’s own parameters that are required to connect and you can choose between:
SQLite - Default solution included database - Creates a new database
Database Name
SQL Server - External database
Server
Database name
Login user
Password
Azure SQL - external azure database
Server
Database name
Login user
Password
Custom - connect to a database using a connection string
Connection string
Provider Name
For this example we’re going to Choose the SQLite Option and click install

This will update the appsettings.json with the database connection string for the SQLite database it has just created and direct you to the login screen. Login with your newly created credentials.

This will now take you to the Umbraco Dashboard where you can go through the Welcome tour or jump straight into customising your CMS
Option 2: Configure external database through environment variables
You can set temporary environment variables that only last within the session your are running in so you can build the solution with the environment variables you need and after building you can close the Terminal session and they will be removed from your system.
If it’s a fresh database with no previous Umbraco data, then it will step through the Umbraco setup page on initial load, but have the database pre-configured at the end of these steps.
In a terminal command line you can enter the variables using the example template below:
export [variable_name]=[variable_value]And once you enter the variable, you can view all the environment variables list that are currently active in the session by entering:
printenvand your new variable should be displayed in the list.
When Umbraco is being built, it uses the launchsettings.json and the appsettings.json to build and run the project, however if there are any Environment Variables that match the appsettings.json variable they will overwrite what is in there, or add it if it’s not currently present to the launchsettings.json.
If we look at the appsettings.json from the initial install you will probably not have any connection string variable listed within there, but if it was within there, the structure would look like the below:
{
  ...

  "ConnectionStrings": {
    "umbracoDbDSN": "",
    "umbracoDbDSN_ProviderName": ""
  }
  ...
}
The above example is when there are no settings applied.
*NOTE: If you forget your login details for admin and need to restart, you can set this in the appsettings.json as blank like above and it will run through the umbraco initial setup screen to allow you to reset your login.
For umbraco to read an environment varibale that matches this, we can use the double underscore between the fields to replicate the brackets.
So to get the variable for the umbracoDbDSN, we would use:
ConnectionStrings__umbracoDbDSN We need to set both the values under ConnectionStrings, if using an SQL Server Database, so the example structure of the connection string itself would follow the format:
Server={server};Database={database};User Id={userId};Password={password};TrustServerCertificate=true;So the full example to set the variables would be:
export ConnectionStrings__umbracoDbDSN="Server={server};Database={database};User Id={userId};Password={password};TrustServerCertificate=true;"
export ConnectionStrings__umbracoDbDSN_ProviderName="Microsoft.Data.SqlClient"
From this you can build and run the project like before and it should run the application and make sure you have it open in your Umbraco folder
dotnet build
dotnet run
This should now run your application locally and connect to an existing SQL database, if the values are not picked up or there is an error, it will show the database error or go through the normal setup screen.
Option 3: Configure database through Umbraco appsettings.json
This option is also a simple one, however I don’t generally put them in here because the connection string will have all the database connection details and store them in git source control that anyone can view in the repository.
If it’s just your local machine that your working on, doing some testing or not committing them, then it is ok. But you never really want your secure passwords and settings to be stored in source control.
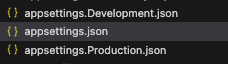
To update the appsettings.json, simply find the file in the main folder of your project, there may be a couple based on version i.e. appsettings.Development.json or appsettings.Production.json as well.
If you edit the appsettings.json file, this means it will apply to every environment, if you edit the Development one, then it will only apply the settings to the Debug or Development build and the same with Production.
Once you open the one you’re after, you can simply add the connection string and ProviderName you want under the main section in it’s own field:
{
  ...

  "ConnectionStrings": {
    "umbracoDbDSN": "add-your-connection-string",
    "umbracoDbDSN_ProviderName": "add-your-provider-name"
  }
  ...
}
*NOTE: If it’s using the SQLite database then the ProviderName will be Microsoft.Data.SQLite, but if it’s the SQLServer then it will be Microsoft.Data.SqlClient
Running the Umbraco App and Accessing the Dashboard
By default Umbraco will be running in Development mode when building and running it, which is fine for your local development which is what we’re setting up here.
You probably got it running by stepping through the database configuration steps in the development mode and getting into the login screen, but here I wanted to add a couple things that may help with running it in different scenarios which could be handy and took me a little bit of messing around to get working.
I hope this helps you with the setup and initial config to run and get it started.
*NOTE: This is assuming that you have completed the last database section before progressing
Running it Normally
For the normal bare bones running of the application in Development Enviroment, you can simply do what we did before, make sure you have the Terminal open and it’s targeting the Umbraco project folder, then run the below:
dotnet build
dotnet run
This will run the application and show the output url that it’s running on your computer:
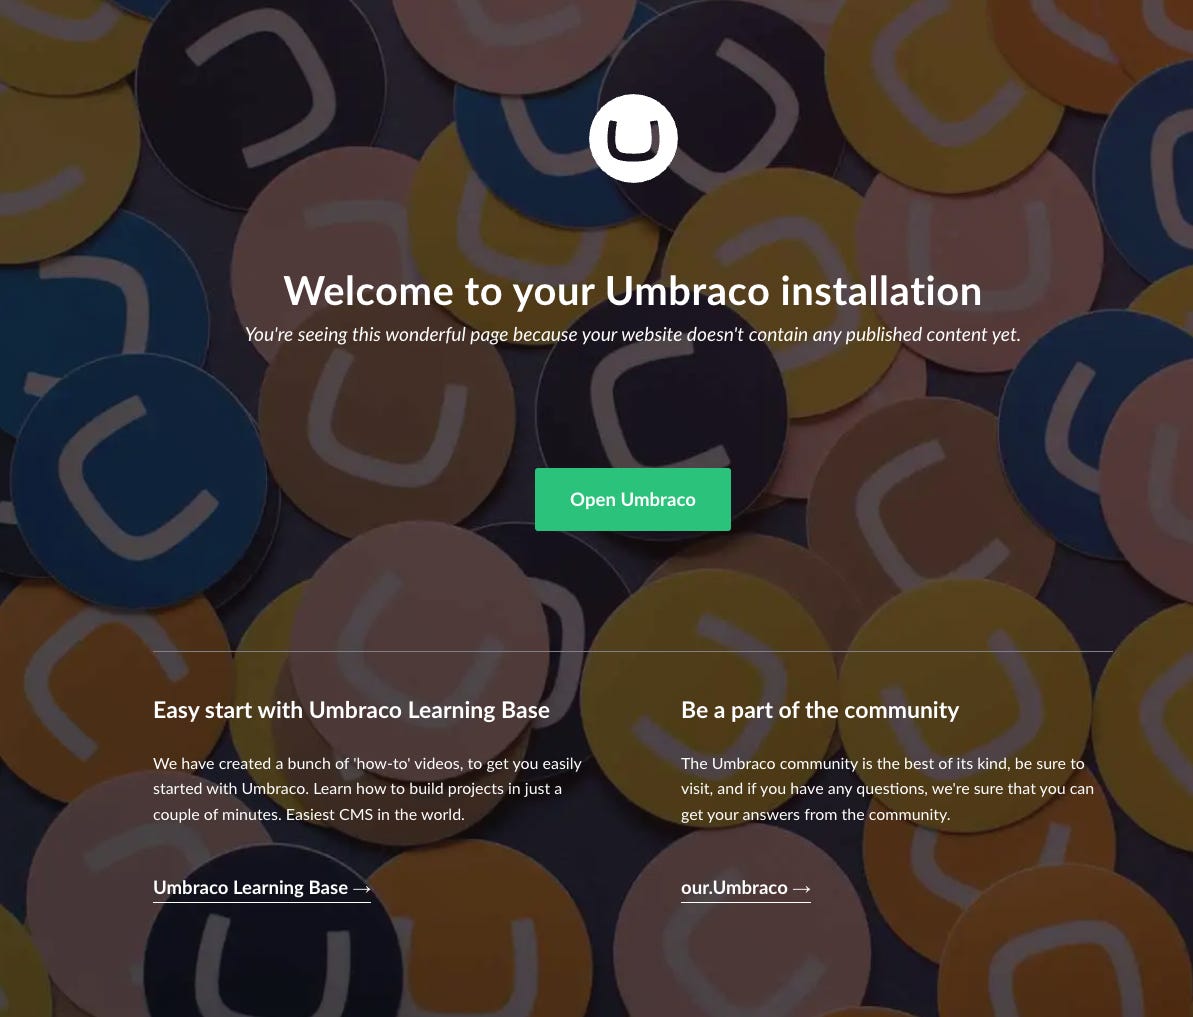
From here you can access the main site by hitting the url: https://localhost:44386, but you’ll probably get a no published content yet screen if it’s the first time accessing it:
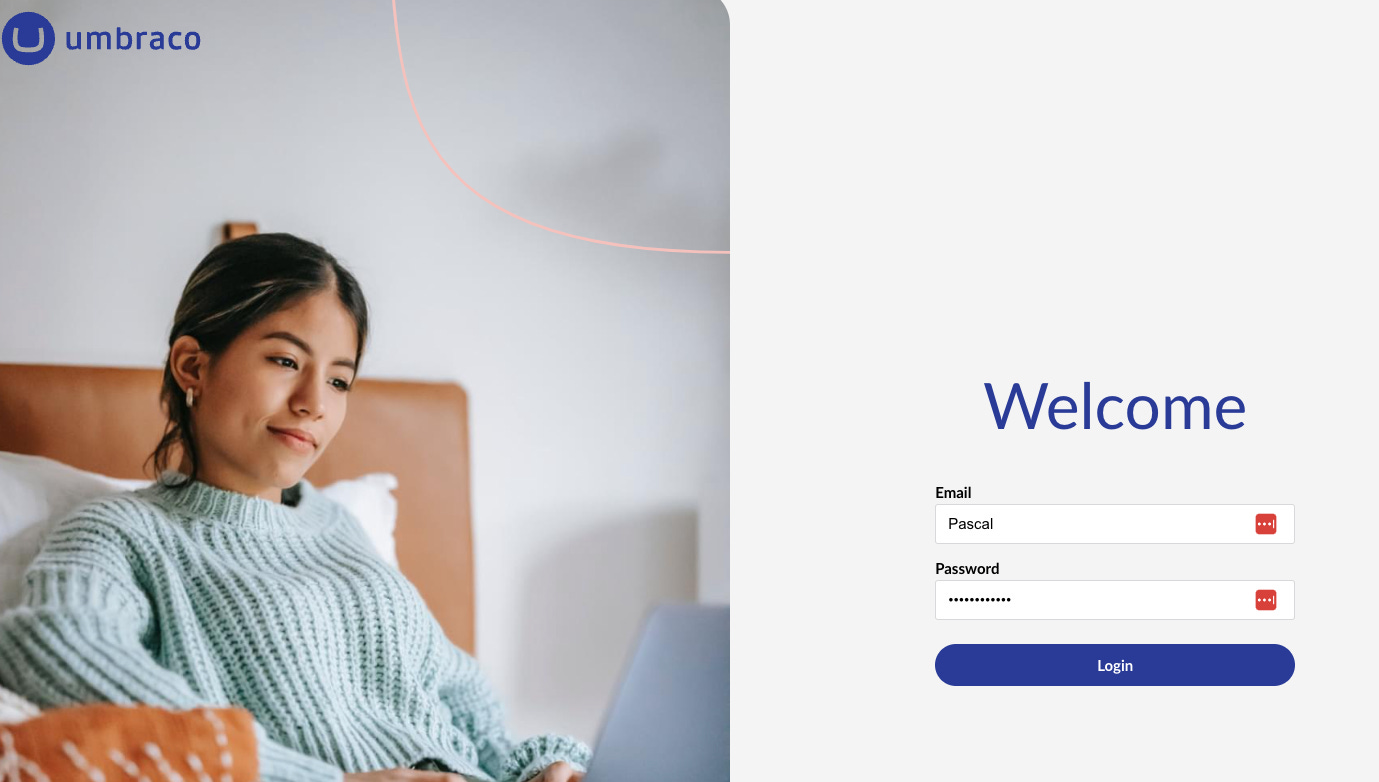
From here you can login to the Umbraco Dashboard bu just appending /umbraco to the end
https://localhost:44386/umbracoAnd this will take you to the login page, enter your details and then you’ll have access to the dashboard:
Running it in a Docker Container
There is also an option to run it in a Docker Container and for this, you will need some pre-configured software and need to edit some of the code.
Firstly, you will need to install Docker from here:
Now that you have that installed, you can create a Dockerfile within your main folder of the Umbraco solution, there’s no extension, it’s just called Dockerfile.
Then within the Dockerfile you can copy and paste the below:
*NOTE: Make sure you change all reference of UmbracoCms in the below code with the name of your project!
# .NET Build
FROM mcr.microsoft.com/dotnet/sdk:8.0-jammy AS build
WORKDIR /src
COPY ["UmbracoCms.csproj", "./"]
RUN dotnet restore "UmbracoCms.csproj"
COPY . .
WORKDIR "/src/."
RUN dotnet build "UmbracoCms.csproj" -c Release -o /app/build

# Change working directory to /app/build
WORKDIR /app/build

# Generate a self-signed certificate
# WARNING: This is for development purposes only and should never be used in production.
RUN dotnet dev-certs https -ep aspnetapp.pfx -p crypticpassword

# .NET Publish
FROM build AS publish
WORKDIR /src
RUN dotnet publish "UmbracoCms.csproj" -c Release -o /app/publish /p:UseAppHost=false

# Final stage
FROM mcr.microsoft.com/dotnet/aspnet:8.0-jammy AS final
WORKDIR /app
COPY --from=publish /app/publish .

# Copy the self-signed certificate from the build stage
# WARNING: This is for development purposes only and should never be used in production.
COPY --from=build /app/build/aspnetapp.pfx /https/

# Set environment variables to use the development certificate
# WARNING: These environment variables are for development purposes only and should never be used in production.
ENV ASPNETCORE_Kestrel__Certificates__Default__Password="crypticpassword"
ENV ASPNETCORE_Kestrel__Certificates__Default__Path="/https/aspnetapp.pfx"

# Creates a non-root user with an explicit UID and adds permission to access the /app folder
RUN adduser -u 5678 --disabled-password --gecos "" appuser && chown -R appuser /app && chmod -R 775 /app

# Change ownership of the certificate file to appuser
RUN chown appuser /https/aspnetapp.pfx

USER appuser

EXPOSE 80
EXPOSE 443
EXPOSE 44386
EXPOSE 33011
ENV ASPNETCORE_URLS="http://+;https://+"
ENTRYPOINT ["dotnet", "UmbracoCms.dll"]
Another thing I’d like to highlight, is that this is just for development, there are user permissions and certificate setup here that is NOT recommended, and it’s highlighted with comments, it’s just to have ti run properly on your local machine.
Save the file.
Now make sure that Docker is running on your machine and in your command line in Terminal, open it up to your Umbraco folder and we’ll build the image that the container is build from using the above Dockerfile:
docker build -t umbraco-cms-image .You can replace the umbraco-cms-image with whatever you want to call your image it creates.
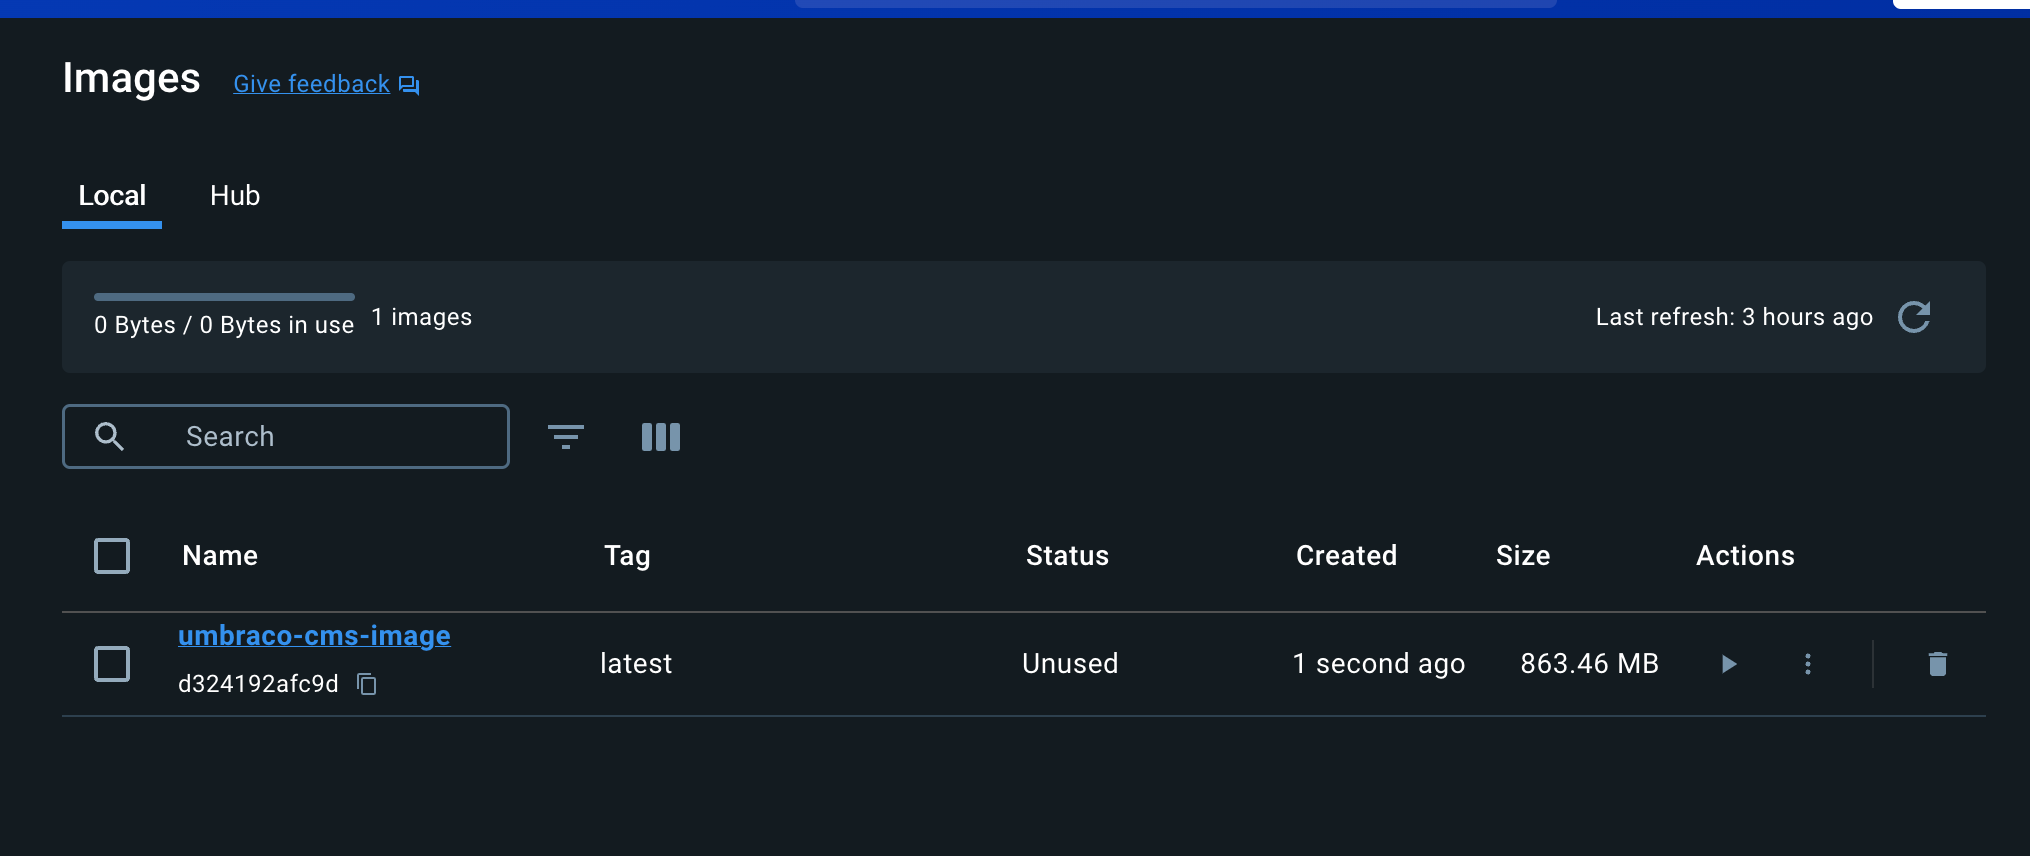
This will build the image and it may take a minute to download all the required files, but once completed, if you open Docker Desktop dashboard it will have it displayed there:
Now we have an image, we can run the container by using the below command:
docker run -d \
  --name umbraco \
  -p $https_port:$https_port \
  -p $http_port:$http_port \
  -e ASPNETCORE_URLS="https://*:$https_port;http://*:$http_port" \
  -e ASPNETCORE_ENVIRONMENT=$environment \
  -e Umbraco__CMS__WebRouting__UmbracoApplicationUrl=https://$site_domain_url \
  -e Umbraco__CMS__Content__Notifications__Email=$email_address \
  -e Umbraco__CMS__Content__MacroErrors=Inline \
  -e Umbraco__CMS__Hosting__Debug=$is_debug \
  -e UMBRACO_DB_SERVER=$db_server \
  -e UMBRACO_DB_NAME=$db_name \
  -e UMBRACO_DB_USER=$db_user \
  -e UMBRACO_DB_PASSWORD=$db_password \
  $docker_image
Replace everything with a $ symbol(including the symbol itself) with the values that apply to your project:
$https_port - This will be the number at the end of the https url you got before from running it
$http_port - This will be the number at the end of the http url you got before from running it
$environment - either Production or Development
$site_domain_url - this will be the url you got before under https -i.e. localhost:44386 - replace the number with your https_port
$email_address - this can be any general email address, it’s not being used now, but it’s usuallt for notifications and things that get sent from umbraco
$is_debug - true or false
$db_server - the ip address/url of the external database, if using default sqlite then remove it and leave empty
$db_name - name of the external db, if using default sqlite then remove it and leave empty
$db_user - the name of the database user, if using default sqlite then remove it and leave empty
$db_password - the passwod for the database user, if using default sqlite then remove it and leave empty
$docker_image - the name of the docker image you created just before i.e. umbraco-cms-image
Then this should run the docker container and you can access it by going to the same port on localhost you tried using before. so in my use case it would be: https://localhost:44386
Alternatively, if you want to not have to manually update each field in this… I have also created a bash script that you can run after the image has been created that asks for the details and then runs the command which may save you some time.
To do this, in your Terminal, run the command:
nano run-docker-container.shThis will open a command line text editor, and then copy and paste the below code in:
#!/bin/bash

# Function to prompt for input until a non-empty value is entered
prompt_until_nonempty() {
    local value=""
    while [ -z "$value" ]; do
        read -p "$1" value
        if [ -z "$value" ]; then
            echo "Input cannot be empty. Please try again."
        fi
    done
    echo "$value"
}

# Function to prompt for input and use default port values if the user doesn't enter anything
prompt_or_default_to_port() {
    local value=""
    read -p "$1 (default is [$2]): " value
    # If the user didn't enter anything, use the default port value
    if [ -z "$value" ]; then
        value=$2
    fi
    echo "$value"
}

# Function to prompt for environment input
prompt_for_environment() {
    local value=""
    while [[ ! "$value" =~ ^(dev|Dev|Development|development|prod|Prod|Production|production)$ ]]; do
        read -p "$1" value
    done
    if [[ "$value" =~ ^(dev|Dev|Development|development)$ ]]; then
        echo "Development"
    else
        echo "Production"
    fi
}

# Function to prompt until "true" or "false" is entered
prompt_until_true_or_false() {
    local value=""
    while true; do
        read -p "$1" value
        if [[ "$value" == "true" || "$value" == "false" ]]; then
            break
        else
            echo "Please enter 'true' or 'false'."
        fi
    done
    echo "$value"
}

# Function to prompt for sensitive information
prompt_sensitive() {
    local value=""
    while [ -z "$value" ]; do
        read -s -p "$1" value
        if [ -z "$value" ]; then
            echo "Input cannot be empty. Please try again."
        fi
    done
    echo "$value"
}

https_port=$(prompt_or_default_to_port "Enter https port" 44386)
http_port=$(prompt_or_default_to_port "Enter http port" 33011)
environment=$(prompt_for_environment "Enter the environment (Dev/Prod): ")
email_address=$(prompt_until_nonempty "Enter the email address for notifications: ")
is_debug=$(prompt_until_true_or_false "Is the app running in debug mode? (true/false): ")
site_domain_url=$(prompt_until_nonempty "Enter the site domain (i.e. localhost:44386): ")

enter_db_details=$(prompt_until_true_or_false "Do you want to enter database details? (true/false): ")

if [[ "$enter_db_details" == "true" ]]; then
    db_server=$(prompt_until_nonempty "Enter the database server address: ")
    db_name=$(prompt_until_nonempty "Enter the database name: ")
    db_user=$(prompt_until_nonempty "Enter the database username: ")
    db_password=$(prompt_sensitive "Enter the database password: ")
    echo ""  # Move to a new line after the password input
else
    db_server=""
    db_name=""
    db_user=""
    db_password=""
fi

docker_image=$(prompt_until_nonempty "Enter the Docker image name: ")

docker run -d \
  --name umbraco \
  -p $https_port:$https_port \
  -p $http_port:$http_port \
  -e ASPNETCORE_URLS="https://*:$https_port;http://*:$http_port" \
  -e ASPNETCORE_ENVIRONMENT=$environment \
  -e Umbraco__CMS__WebRouting__UmbracoApplicationUrl=https://$site_domain_url \
  -e Umbraco__CMS__Content__Notifications__Email=$email_address \
  -e Umbraco__CMS__Content__MacroErrors=Inline \
  -e Umbraco__CMS__Hosting__Debug=$is_debug \
  -e UMBRACO_DB_SERVER=$db_server \
  -e UMBRACO_DB_NAME=$db_name \
  -e UMBRACO_DB_USER=$db_user \
  -e UMBRACO_DB_PASSWORD=$db_password \
  $docker_image

## Command to make the script executable
# chmod +x run-docker-container.sh
Once pasted, Press Ctrl+x
This will look like nothing has changed, but it will be asking you at the bottom if you want to save changes.
push Y
Then enter
This should save that file in the folder you were in, now we need to make the file executable to it can run so in the same path, in the command line enter:
chmod +x run-docker-container.shand then run the file:
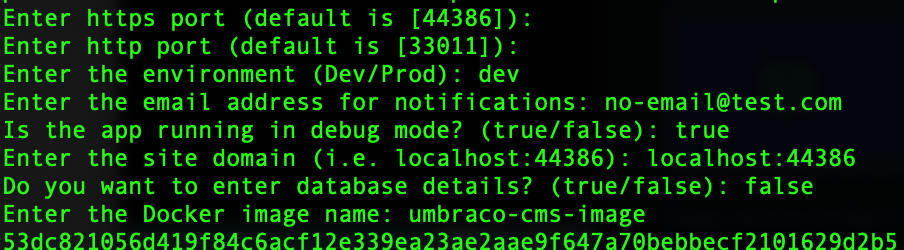
./run-docker-container.shThis will run the script and step you through the questions to answer, fill out the fields and then it will start the docker container.
*NOTE: if you don’t want to use an external database and run it with a new sqlite database, when it asks Do you want to enter database details enter false and it will only use a local sqlite database in the container.
And once completed it will show the hash for the container:
And then going to Docker Desktop, you should see the container running, and be able to access it on your machine at https://localhost:<port>
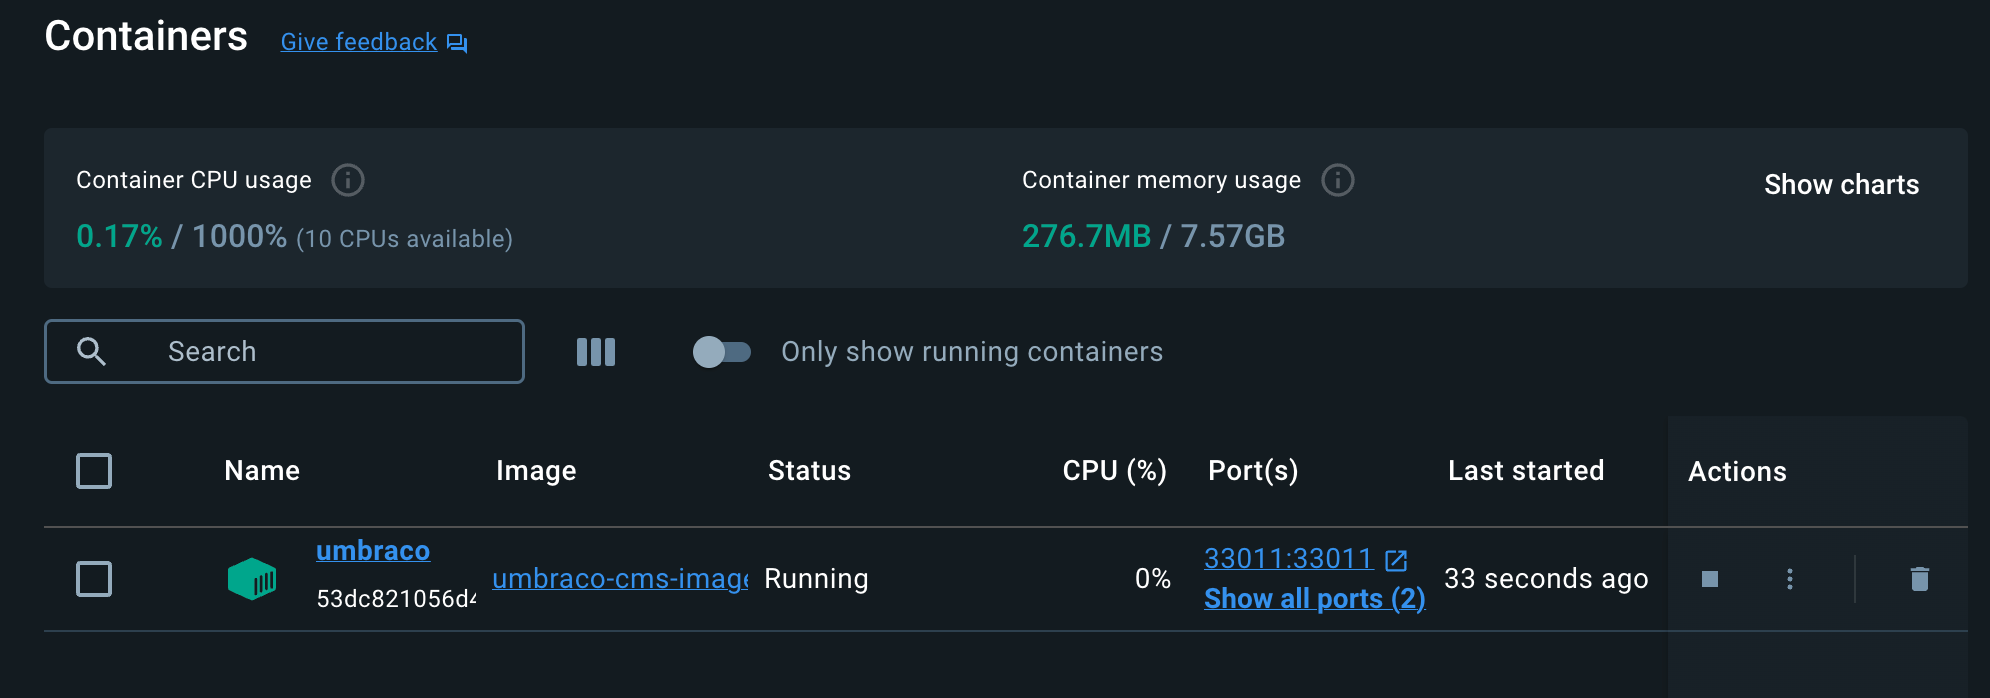
*NOTE: Just remember every time you make changes, you will need to build the docker image again and then run the container command, otherwise it won’t show any changes. Just make sure you delete the old container and image before you do it or you’ll end up with loads of them.
Conclusion
There we go! Now you should have successfully created an Umbraco solution on your local machine, linked up the database to whichever one you wanted from a fresh install and even had a look at a way to run it in a docker container on your machine if you want.
Once you have the code setup on your machine, this is probably the best time to setup some source control to manage your code so you can edit and play around with it without breaking anything too much.
I did a post on Source Control and git, you can check out the setting up git in your project section of it with this and it will help out with editing code, learning and building new implementations without breaking your project: