

Using Cloudflare to set maintenance mode for your site
When there's updates and releases to your site it can go down and you want to be able to have visibility to your users what's happening. Cloudflare can help with the process and here's how


If you’re not familiar with Cloudflare, it’s an online web infrastructure and website security company that provides multiple services that assist with website performance, security and reliability.
They handle things such as, Content Delivery Network(CDN), DDoS Protection, Web Application Firewalls, DNS Services, SSL/TLS Encryption, Load Balancing and Serverless Computing, just to name a few of their offerings.
Nearly all my sites I setup are run through Cloudflare so you can get the extra control of routing and managing your traffic. It’s also super handy if you need to setup quick redirects, or even change domains, it’s all handled in a single place.
Now, if you’re routing your sites through Cloudflare, then you can also use it to setup maintenance pages or alert landing pages when your site may be down to notify your users so they don’t just hit an empty “site unreachable” page.
Let’s run through when, why and how we can set one up through Cloudflare.
When and why use a maintenance page?
The maintenance message is used when your site or services are going down and users don’t have access to them as they normally would.
It could be your doing routine updates, you’re adding some new features, or even there’s some system issues that have taken a page down and you want to inform users what’s going on.
It’s something to let users know what is happening as there’s nothing worse than hitting a blank page that should be there or just a “server down” error. As an informed user is less likely to follow up and get in contact or have issues when they know what is going on.
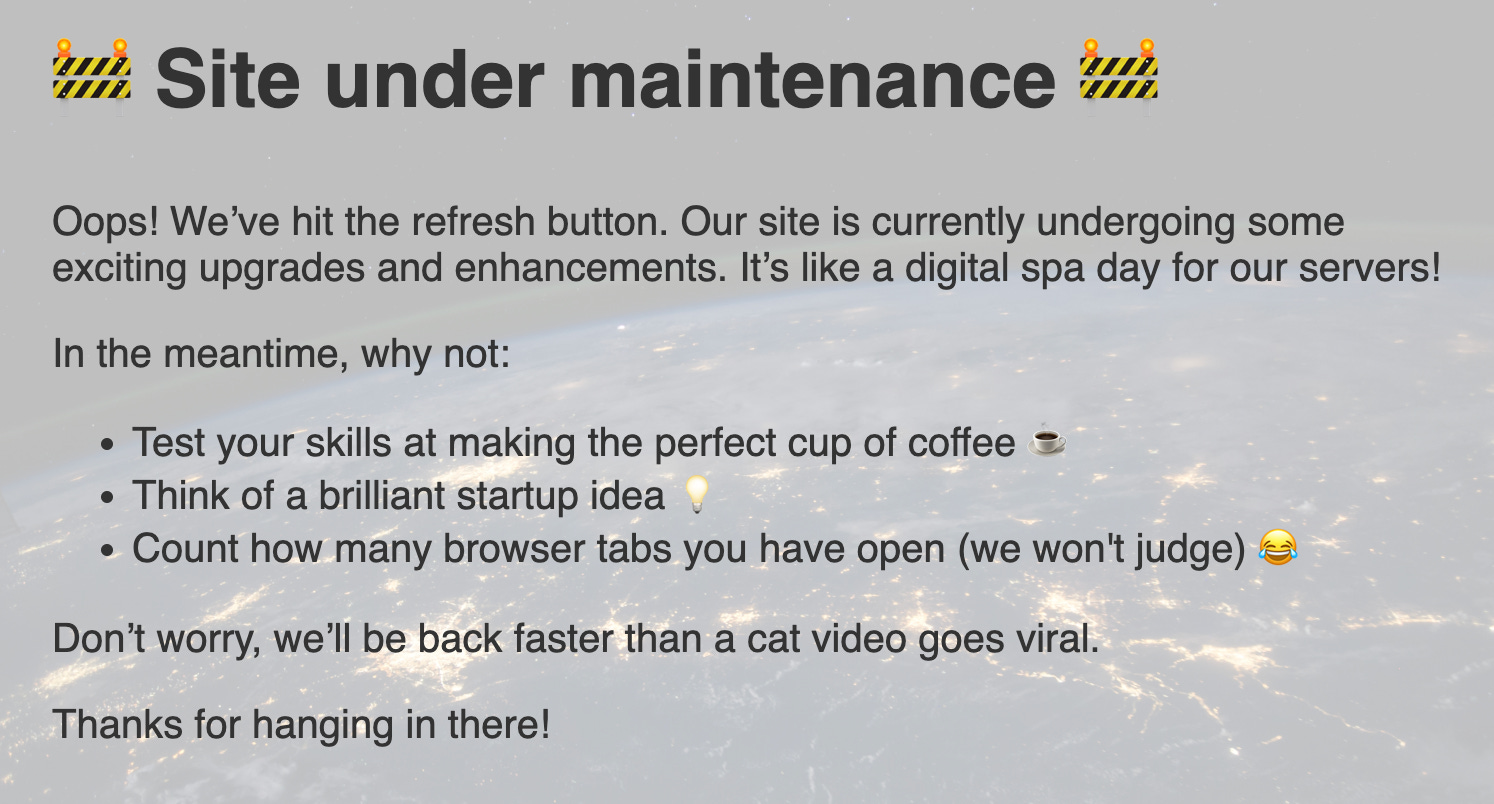
This is an example of a maintenance message when a user hits one of my sites so that they know it’s and expected downtime and that it will be back shortly.
You can choose to add an expected time of return, or timeframe, etc. The message is up to you.
How it works
What we will be doing is creating a worker within cloudflare that will switch the domains that are being served to all users from the main existing website to a prepared maintenance page website.
This means that the worker will step in and say “Hey, anyone that comes to ‘https://example.com’ instead of showing them the normal page we’ll switch it with ‘https://maintenance.example.com’”.
So this routes everything to the prepared page and no traffic runs to the actual site which could be down or have errors, or is building, depending on how your site is setup.
This means that for the user, they will just see the prepared maintenance page and only hit that until it’s switched over again.
There are a few steps that are required to set this up:
Create the worker
Create the HTML markup of the maintenance page you want to display
Get the required credentials
Trigger the workers
(optional) Create scripts to run the requests
Creating a worker
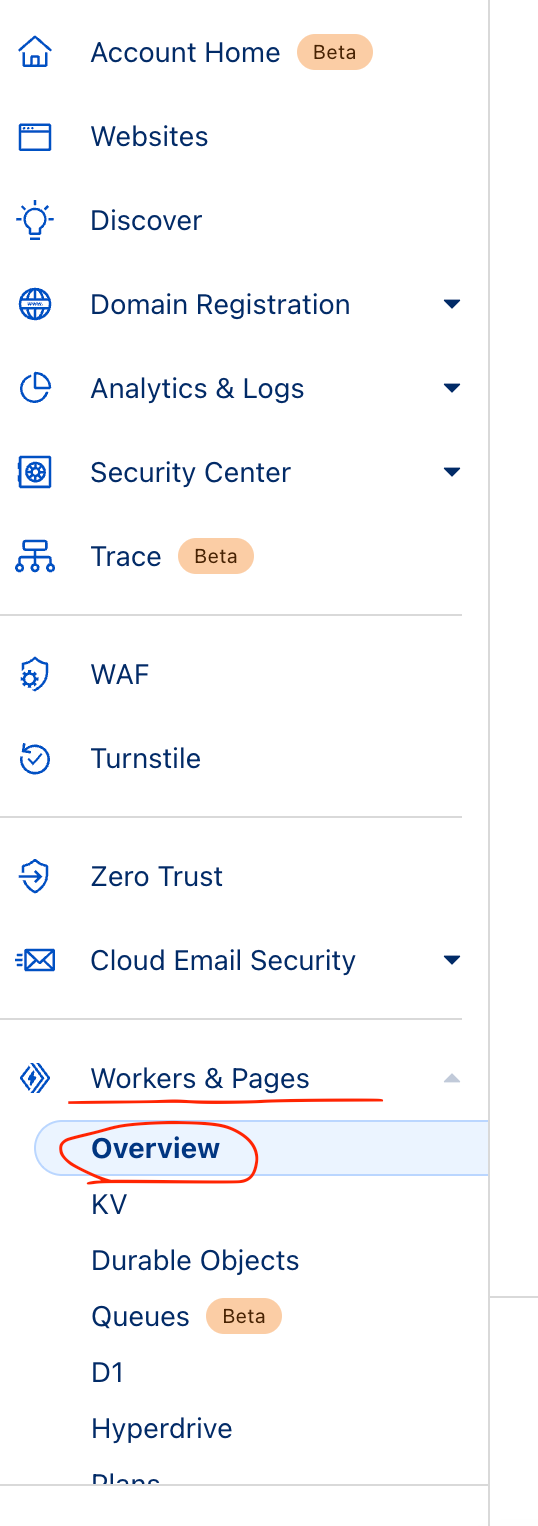
First we need to create a worker that can run the scripts and serve up the page when it transitions and for that we can select the Overview section of the Workers & Pages in the main menu of Cloudflare.
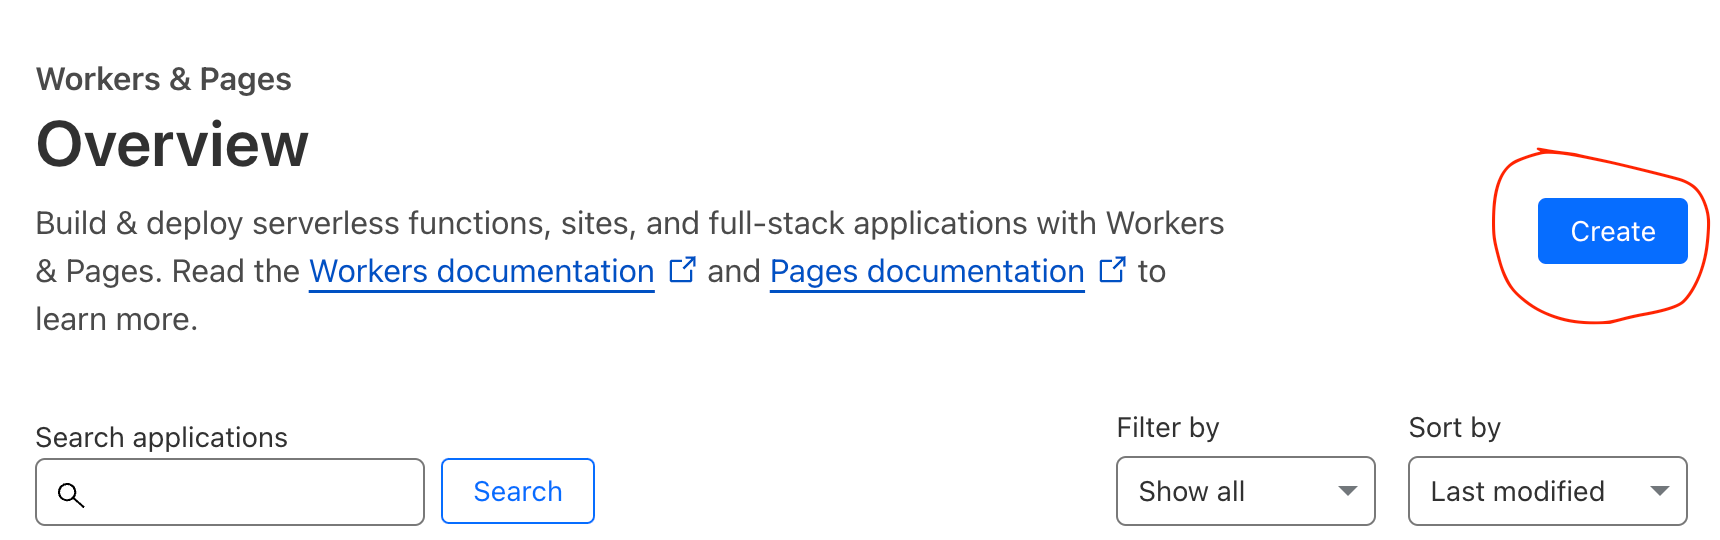
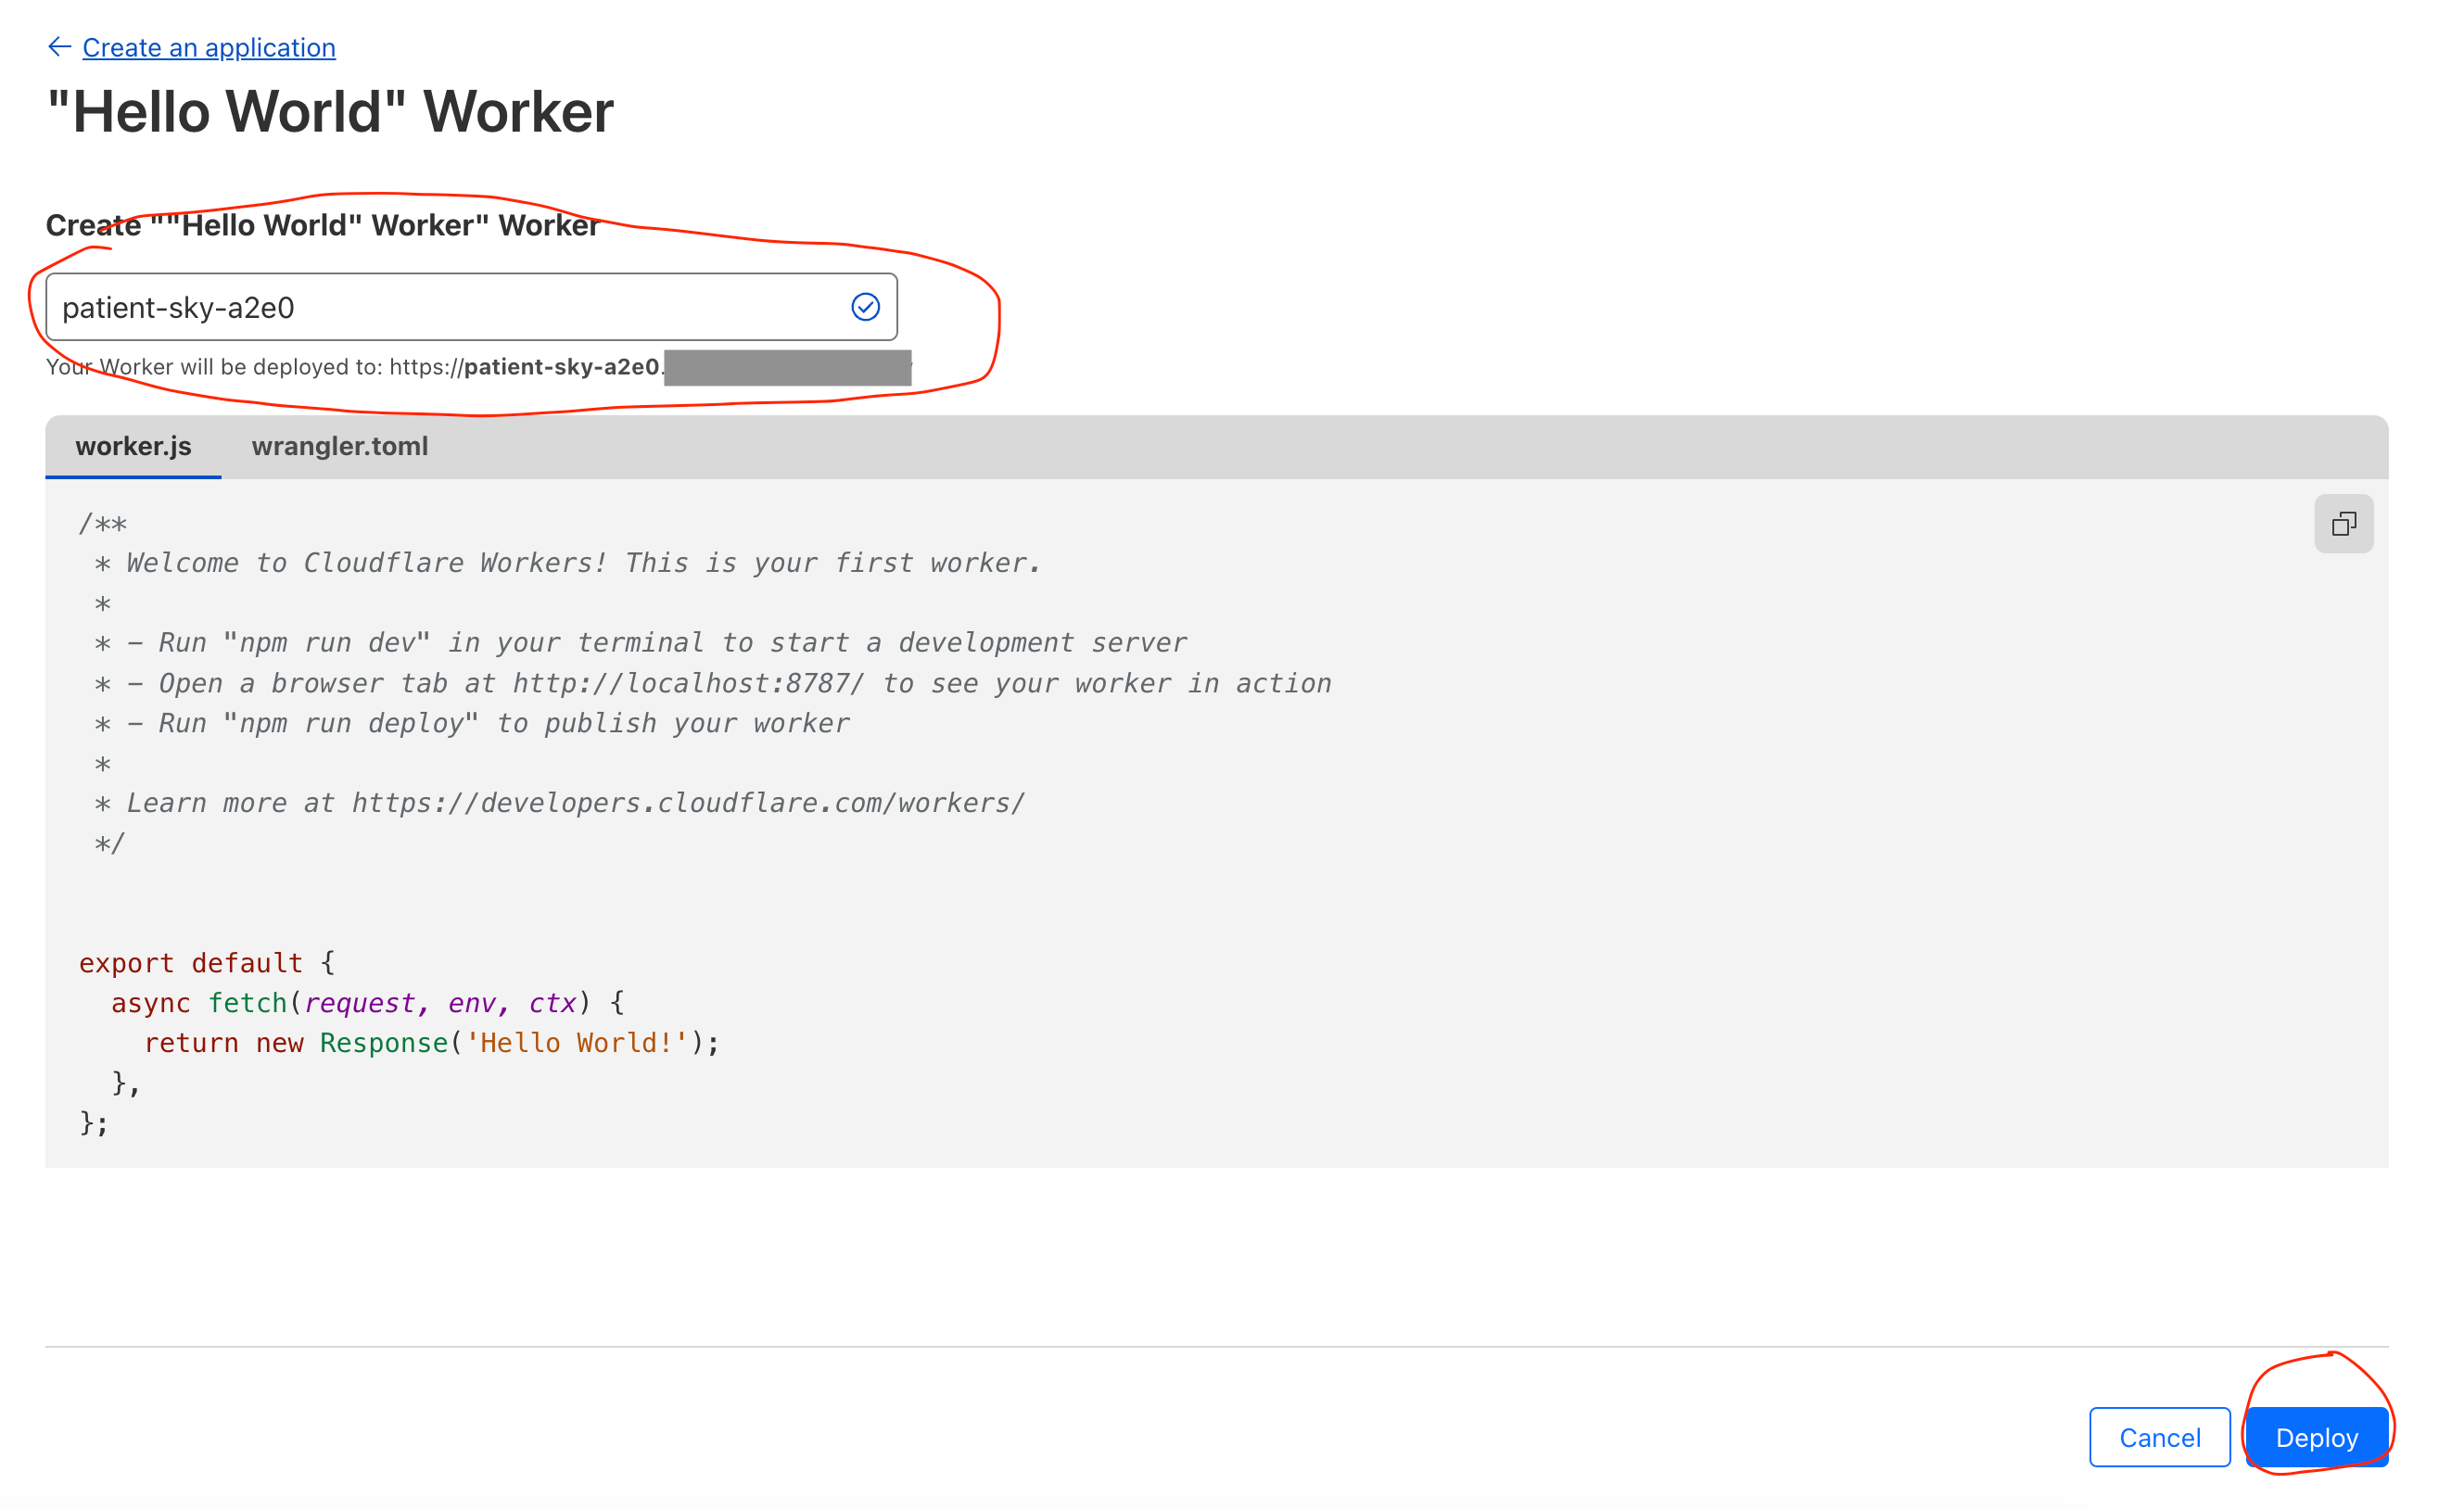
Then we can select the Create button to create a new worker, there are multiple templates, but we’ll be doing it from scratch.
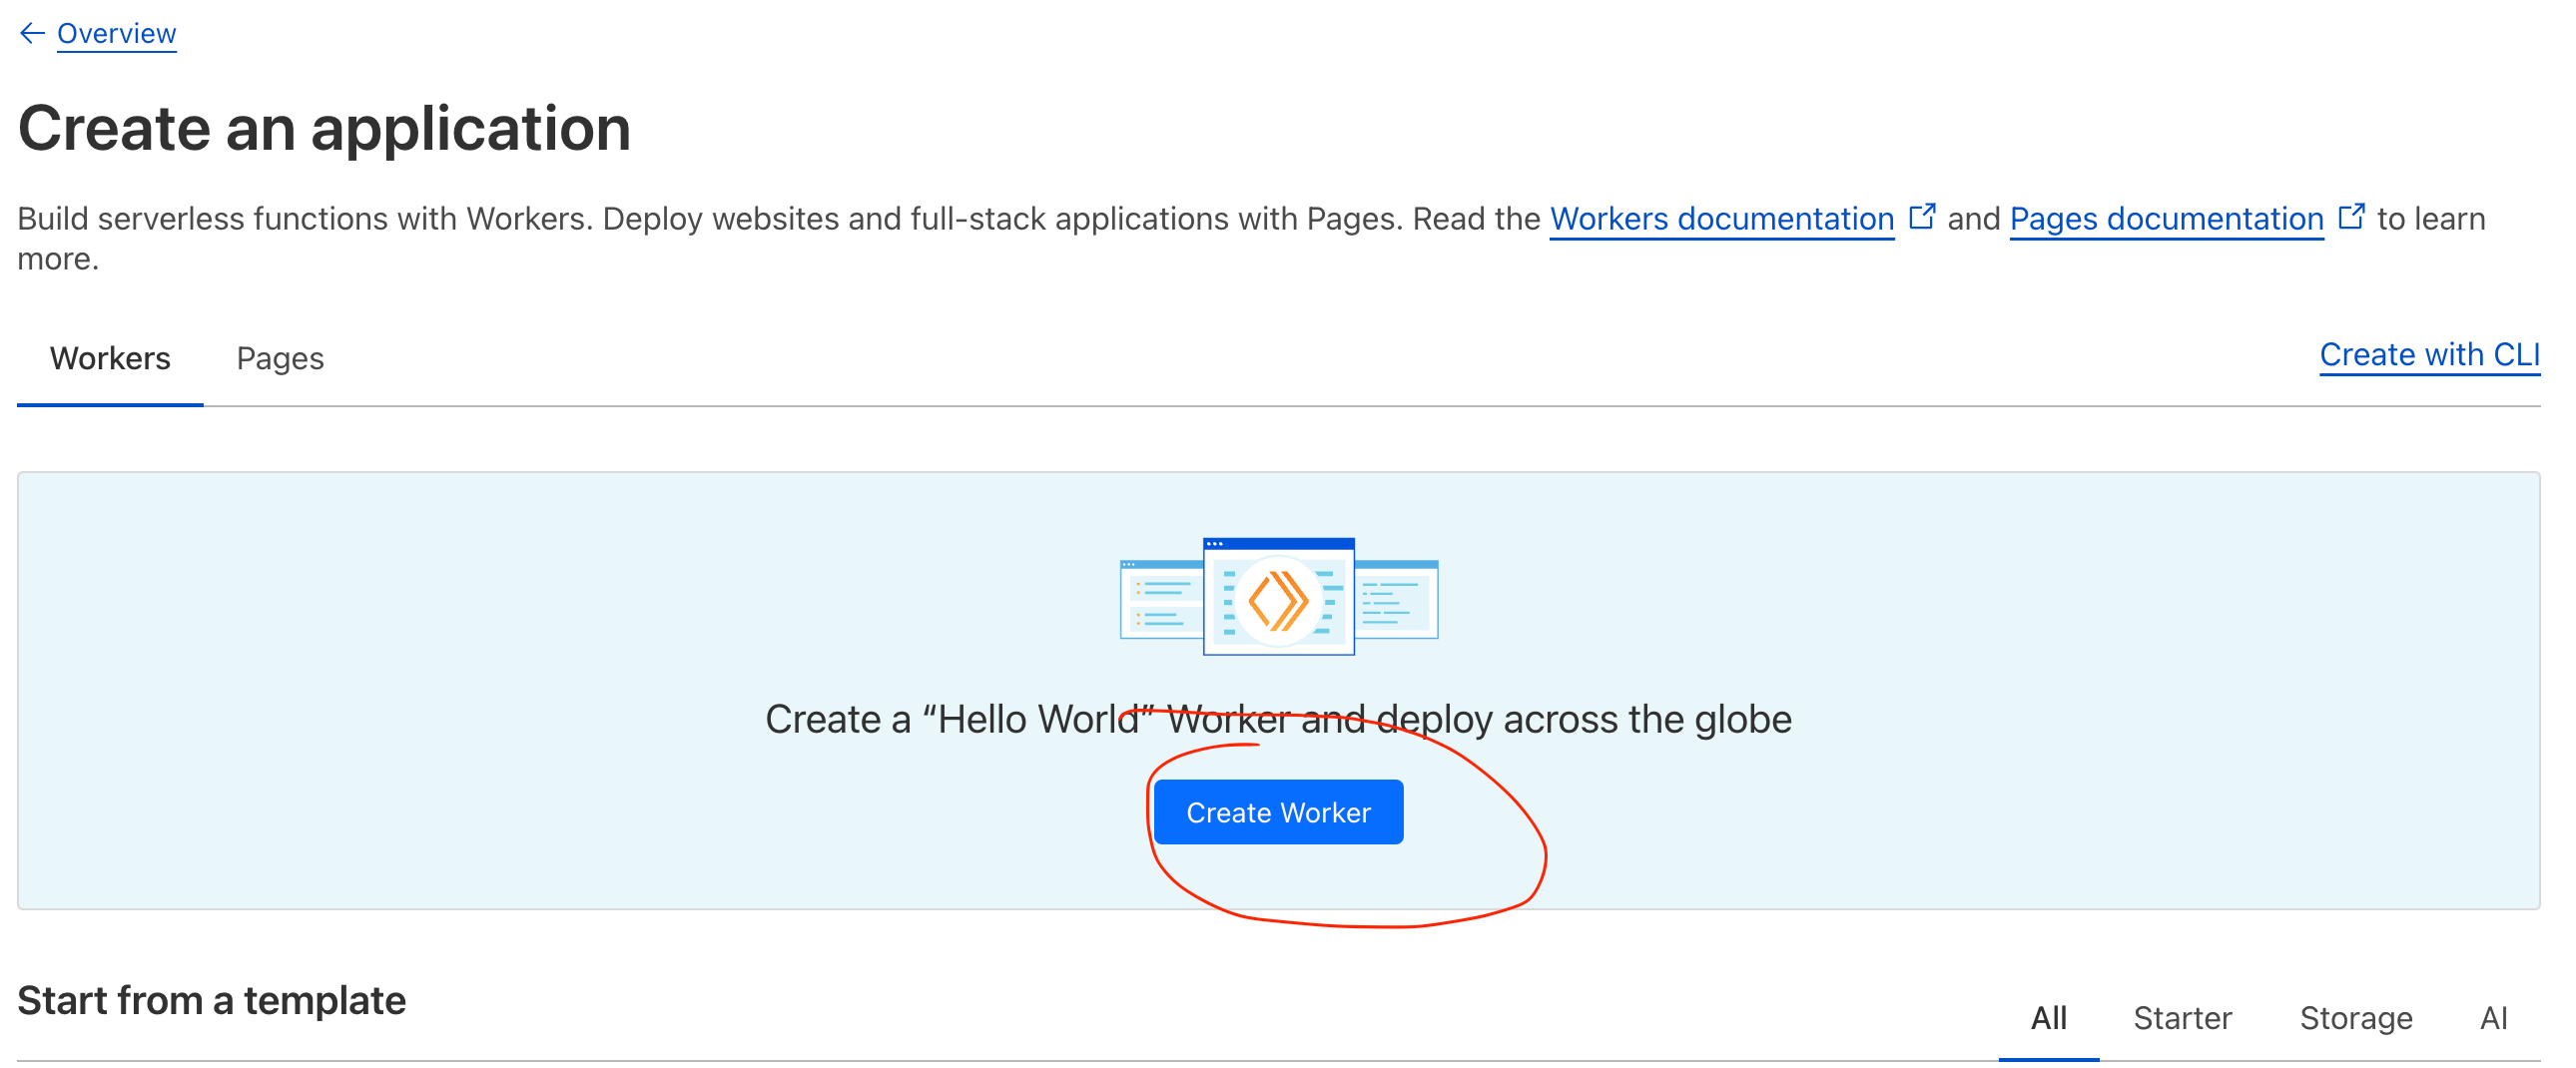
Name your worker and then Deploy it, don’t worry, we’ll edit all the details in a minute.
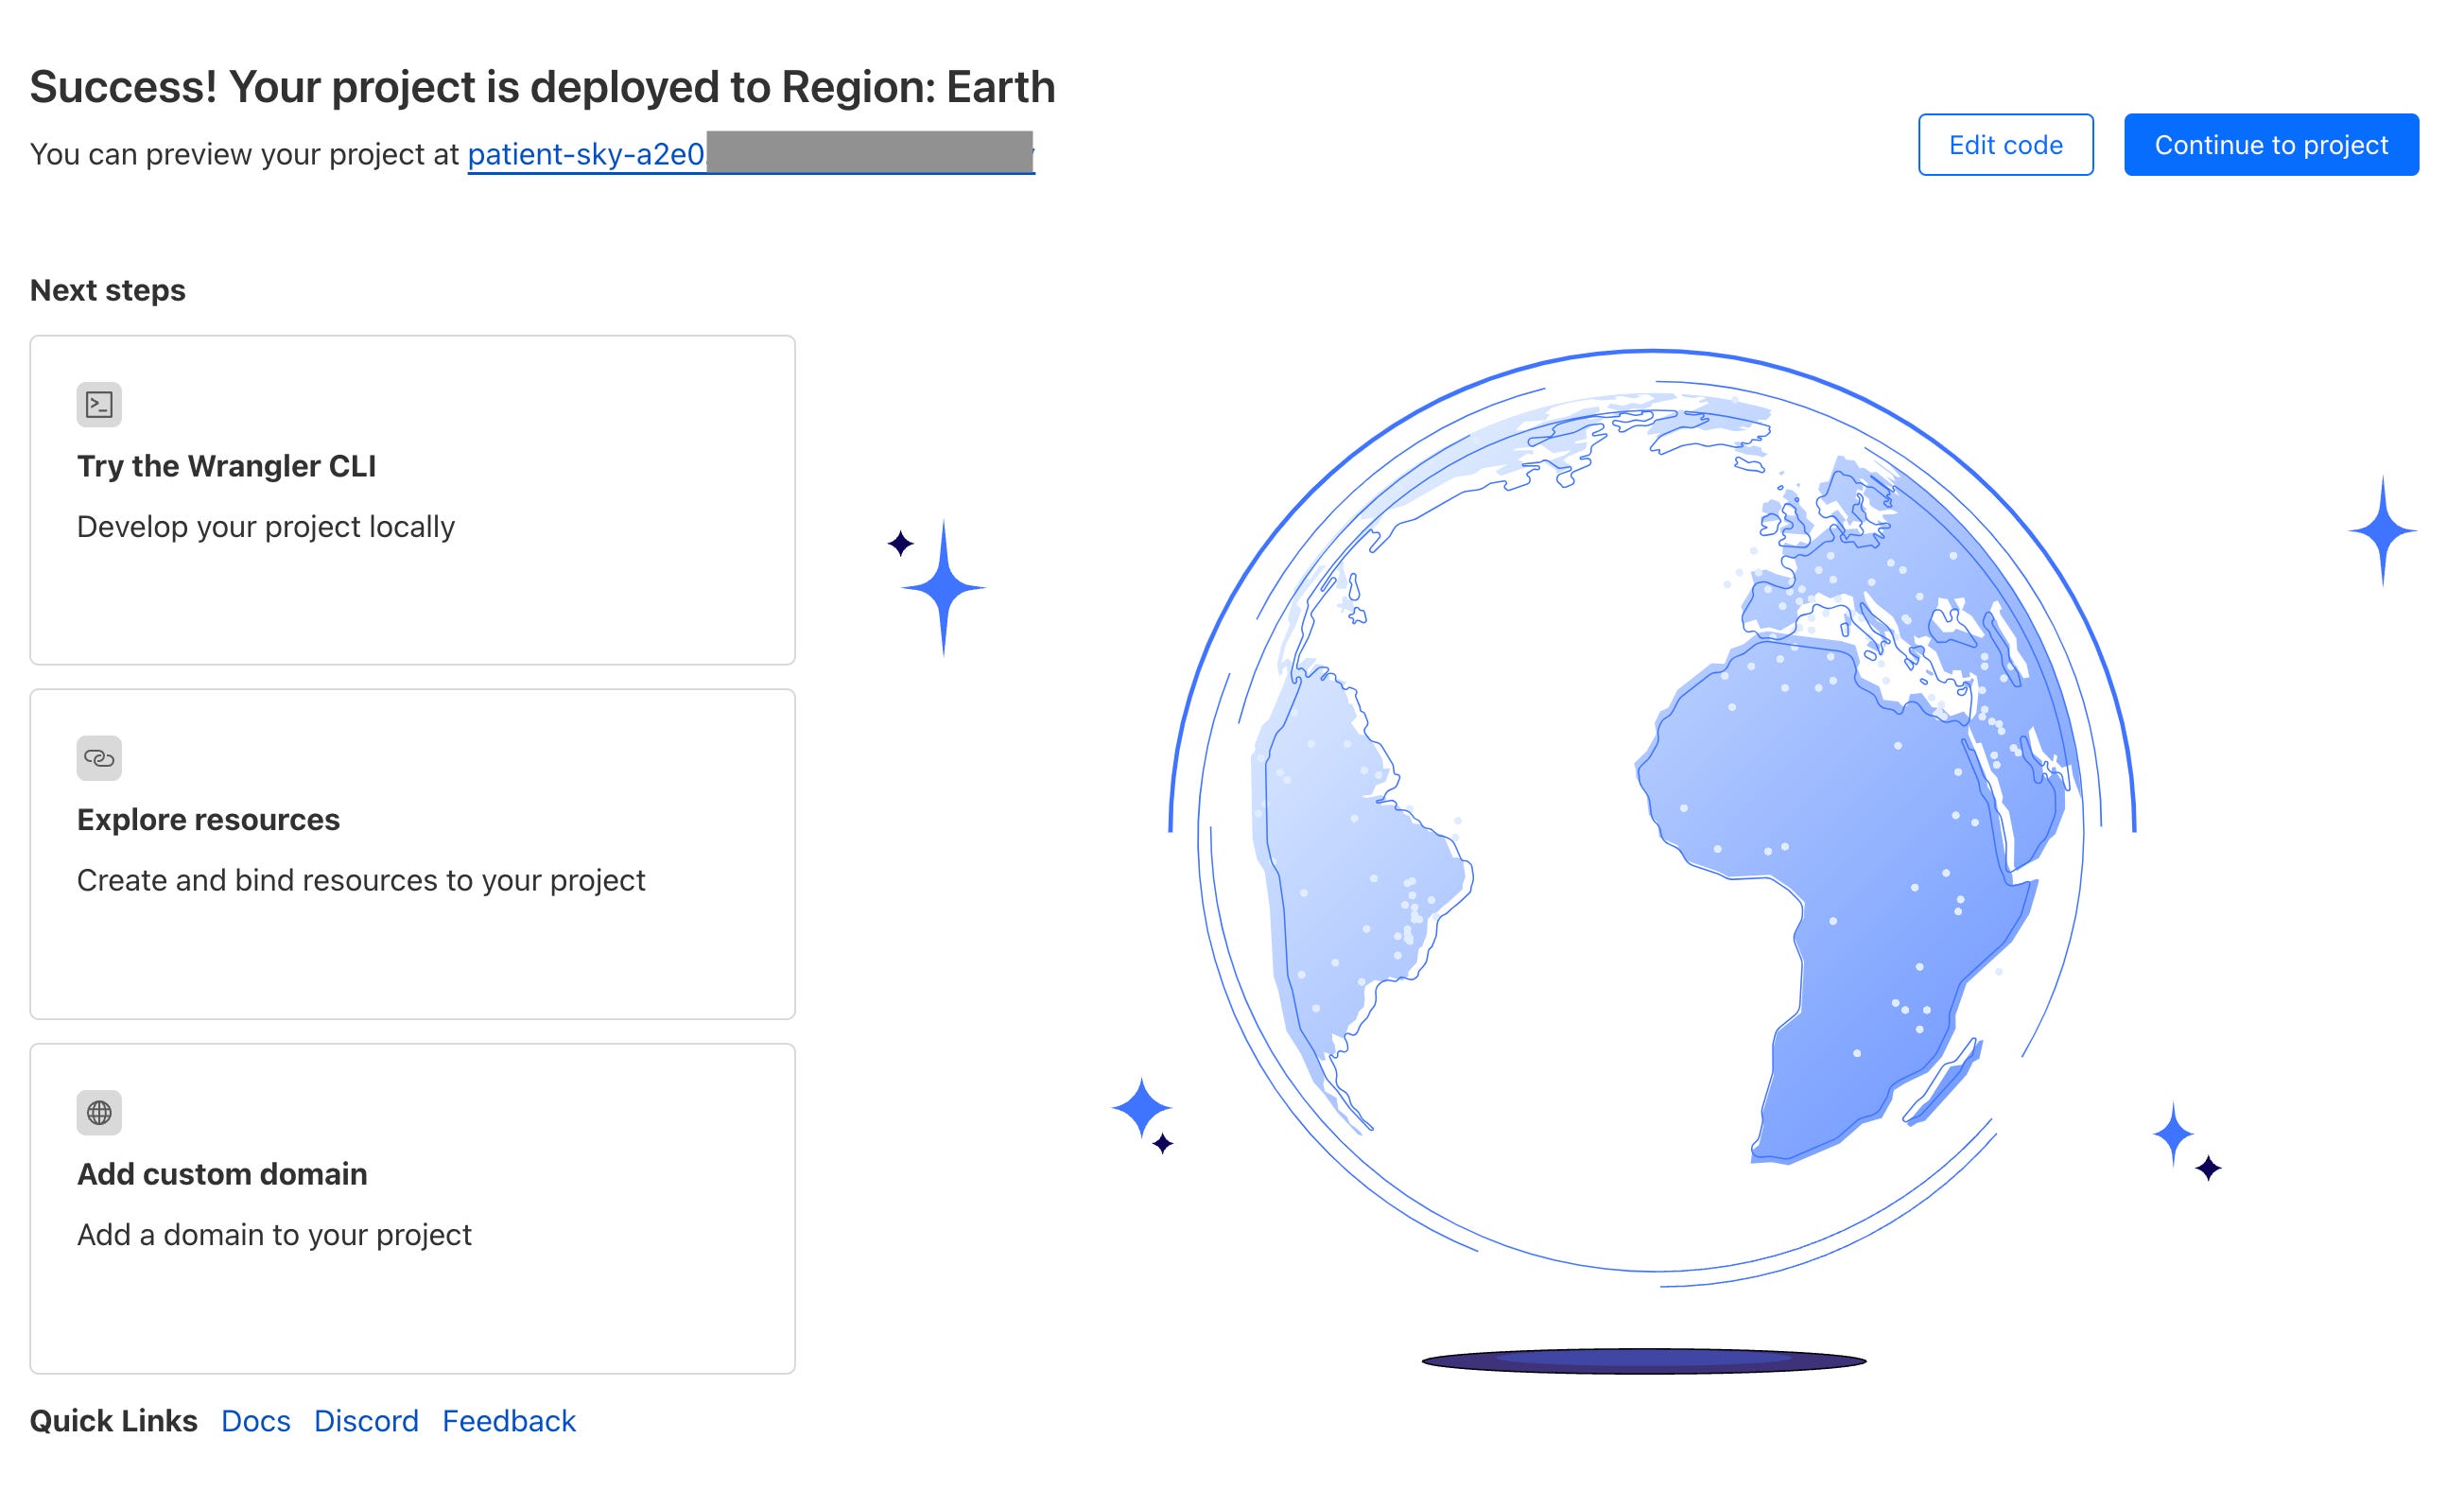
Once deployed, then you can click on the link and it will take you to a blank page that just says ‘Hello World’, but you can also click on the Edit Code button, which will take you to the code editor:
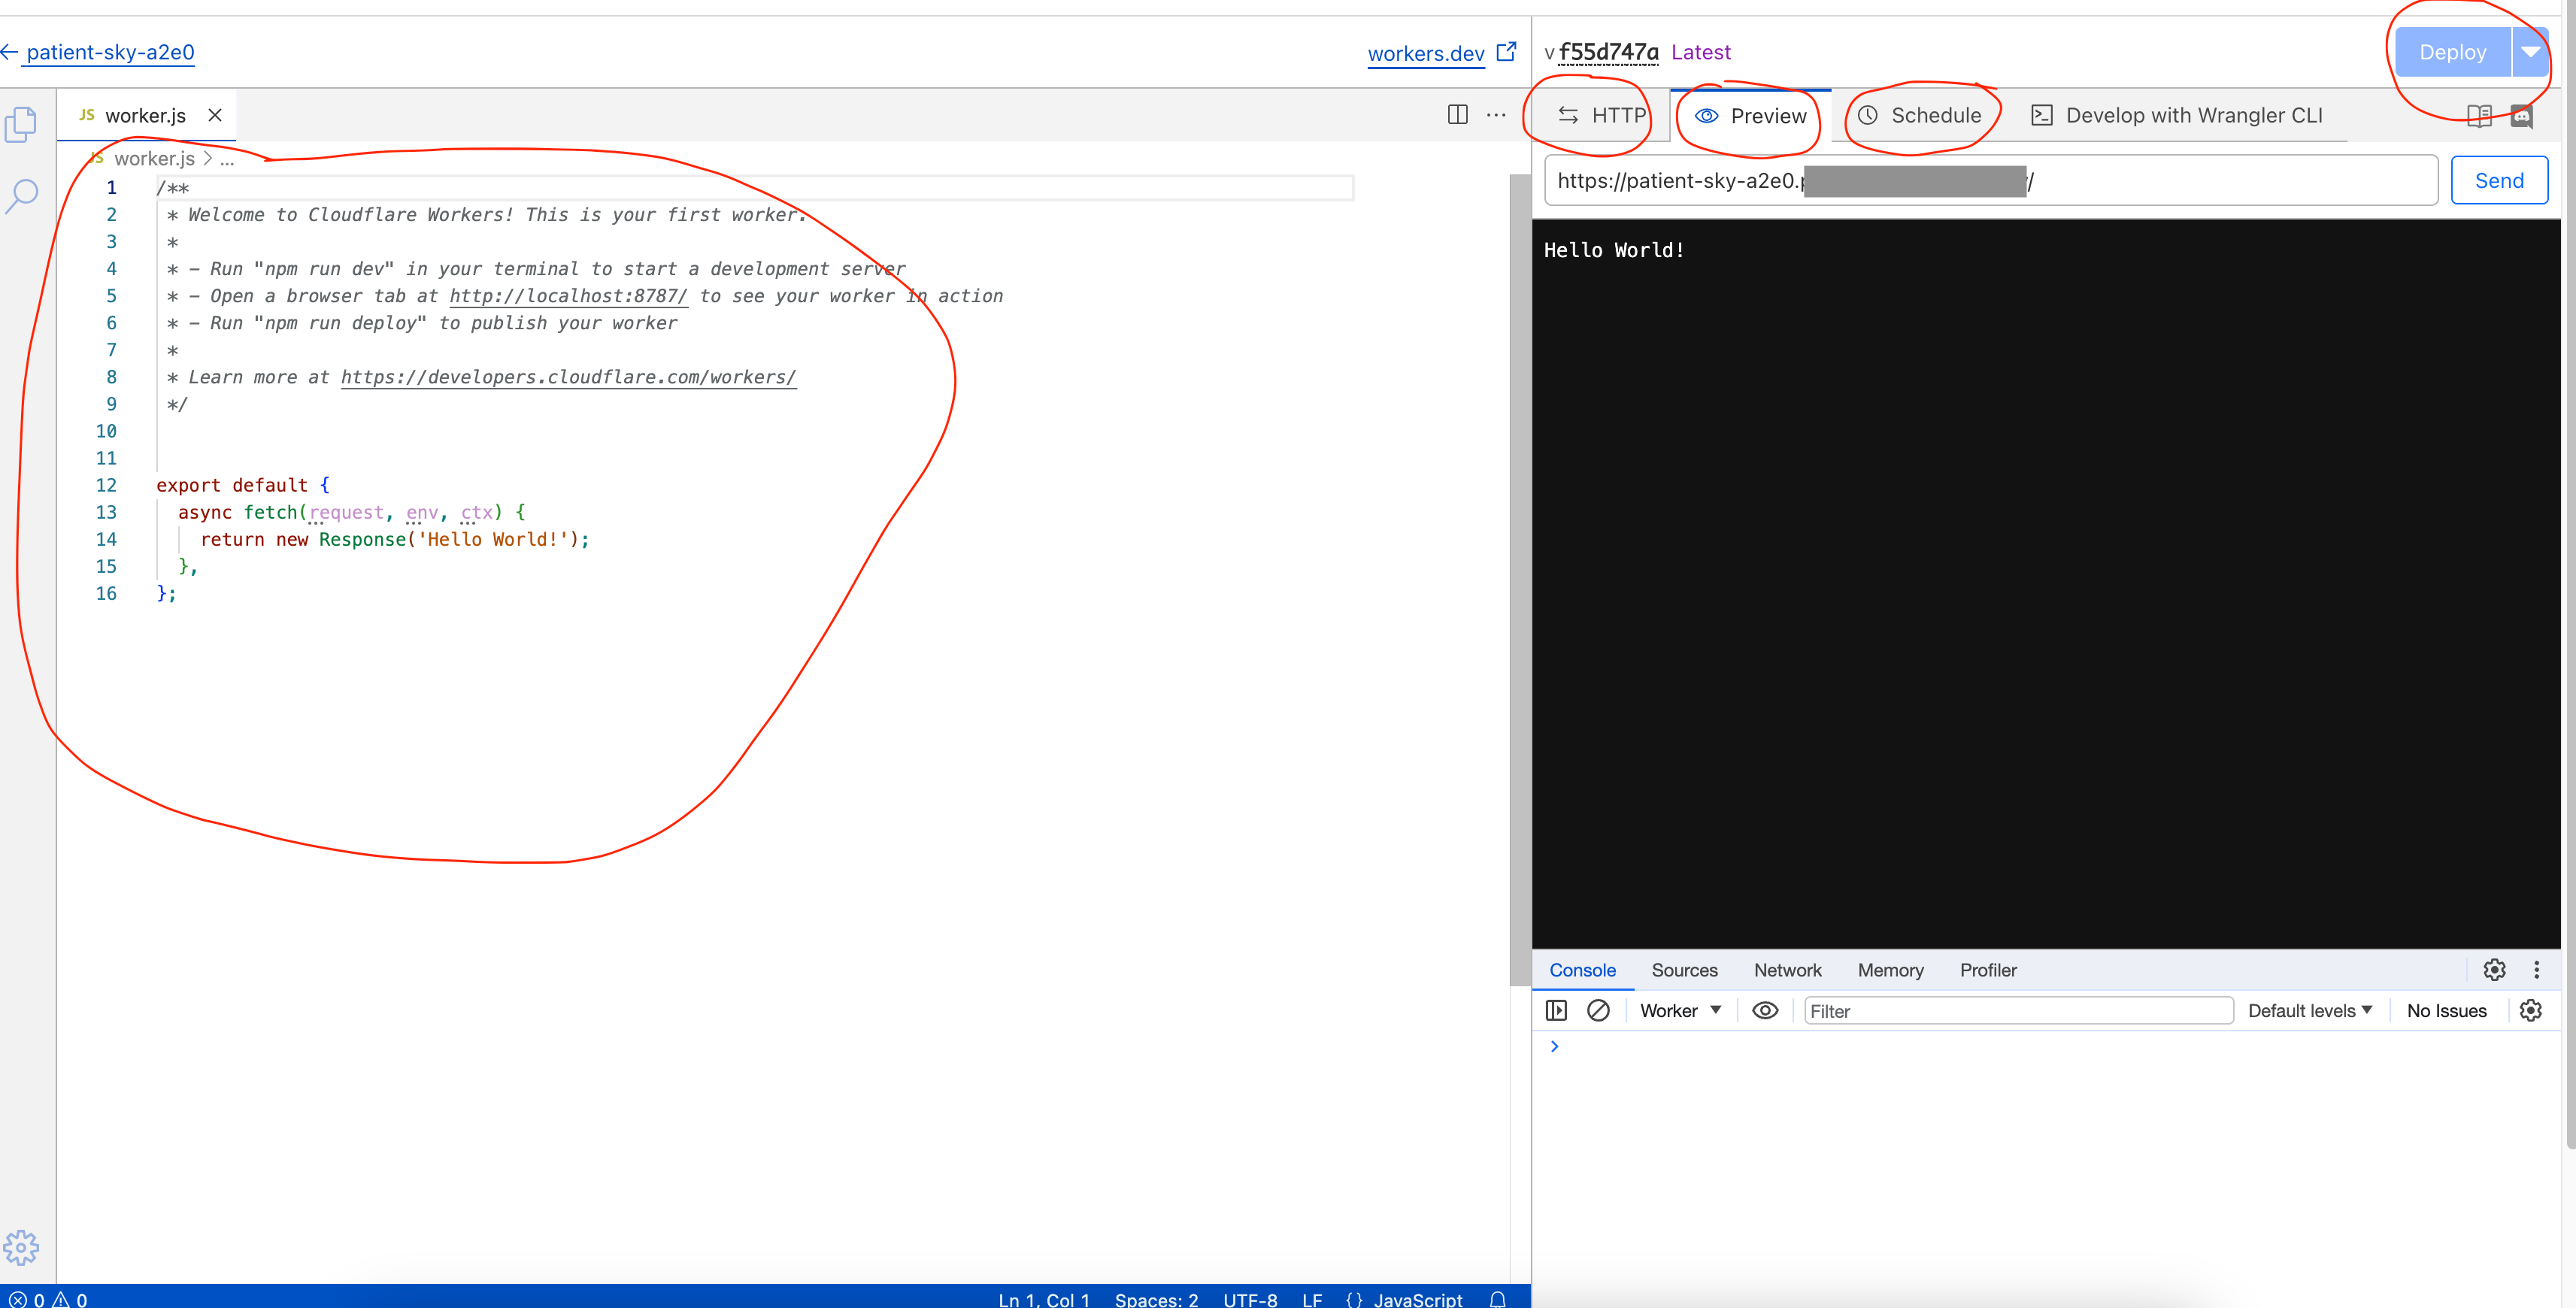
From the Editor, you can edit the worker.js code, view the HTTP request and response examples, preview the html page and also schedule the changes for the worker.
Once you make any changes, you can select the Deploy button and it will update and publish the worker with your updated changes
What we’ll do is replace the worker.js content with the below code, make sure you edit and change the parts to suit your situation - the original version was used from here:
* - Run "npm run dev" in your terminal to start a development server
* - Open a browser tab at http://localhost:8787/ to see your worker in action
* - Run "npm run deploy" to publish your worker
*
*
* Learn more at https://developers.cloudflare.com/workers/
*/
addEventListener('fetch', event => {
event.respondWith(handleRequest(event.request))
})
/**
* Respond to the request
* @param {Request} request
*/
async function handleRequest(request) {
let modifiedHeaders = new Headers()
modifiedHeaders.set('Content-Type', 'text/html')
modifiedHeaders.append('Pragma', 'no-cache')
return new Response(maintenancepage, {headers: modifiedHeaders})
}
let maintenancepage = `
<!doctype html>
<head>
<!-- Add any meta content here i.e. -->
<!--
<title>Your site title</title>
<meta charset="utf-8" />
<meta name="viewport" content="width=device-width, initial-scale=1, user-scalable=no" />
-->
<!-- Add any custom Styling here -->
<!--
<style>
body {
text-align: center;
background: url('https://images.unsplash.com/photo-1451187580459-43490279c0fa') no-repeat center center fixed;
background-size: cover;
-webkit-background-size: cover;
-moz-background-size: cover;
-o-background-size: cover;
display: flex;
justify-content: center;
align-items: center;
height: 100vh;
margin: 0;
}
.content {
background-color: rgba(255, 255, 255, 0.75);
background-size: 100%;
color: inherit;
border-radius: 15px;
padding: 2rem;
}
h1 { font-size: 40px;}
body { font: 20px Helvetica, sans-serif; color: #333; }
article { display: block; text-align: left; margin: 0 auto; }
a:hover { color: #333; text-decoration: none; }
@media (min-width: 1000px) {
body {
padding: 150px;
}
.content {
margin: auto;
padding: 1px 100px 10px 100px;
}
article {
width: 75%;
}
}
</style>
-->
</head>
<body>
<article>
<div class="background">
<div class="content">
<h1>🚧 Site under maintenance 🚧</h1>
<p>Oops! We’ve hit the refresh button. Our site is currently undergoing some exciting upgrades and enhancements. It’s like a digital spa day for our servers!
</p>
<p>In the meantime, why not:</p>
<ul>
<li>Test your skills at making the perfect cup of coffee ☕ </li>
<li>Think of a brilliant startup idea 💡</li>
<li>Count how many browser tabs you have open (we won't judge) 😂</li>
</ul>
<p>Don’t worry, we’ll be back faster than a cat video goes viral.</p>
<p>Thanks for hanging in there!</p>
</div>
</div>
</article>
</body>
`;*NOTE: I’ve commented out the styles and meta content because for some reason it’s changing the substack page styling too.
Add route to worker
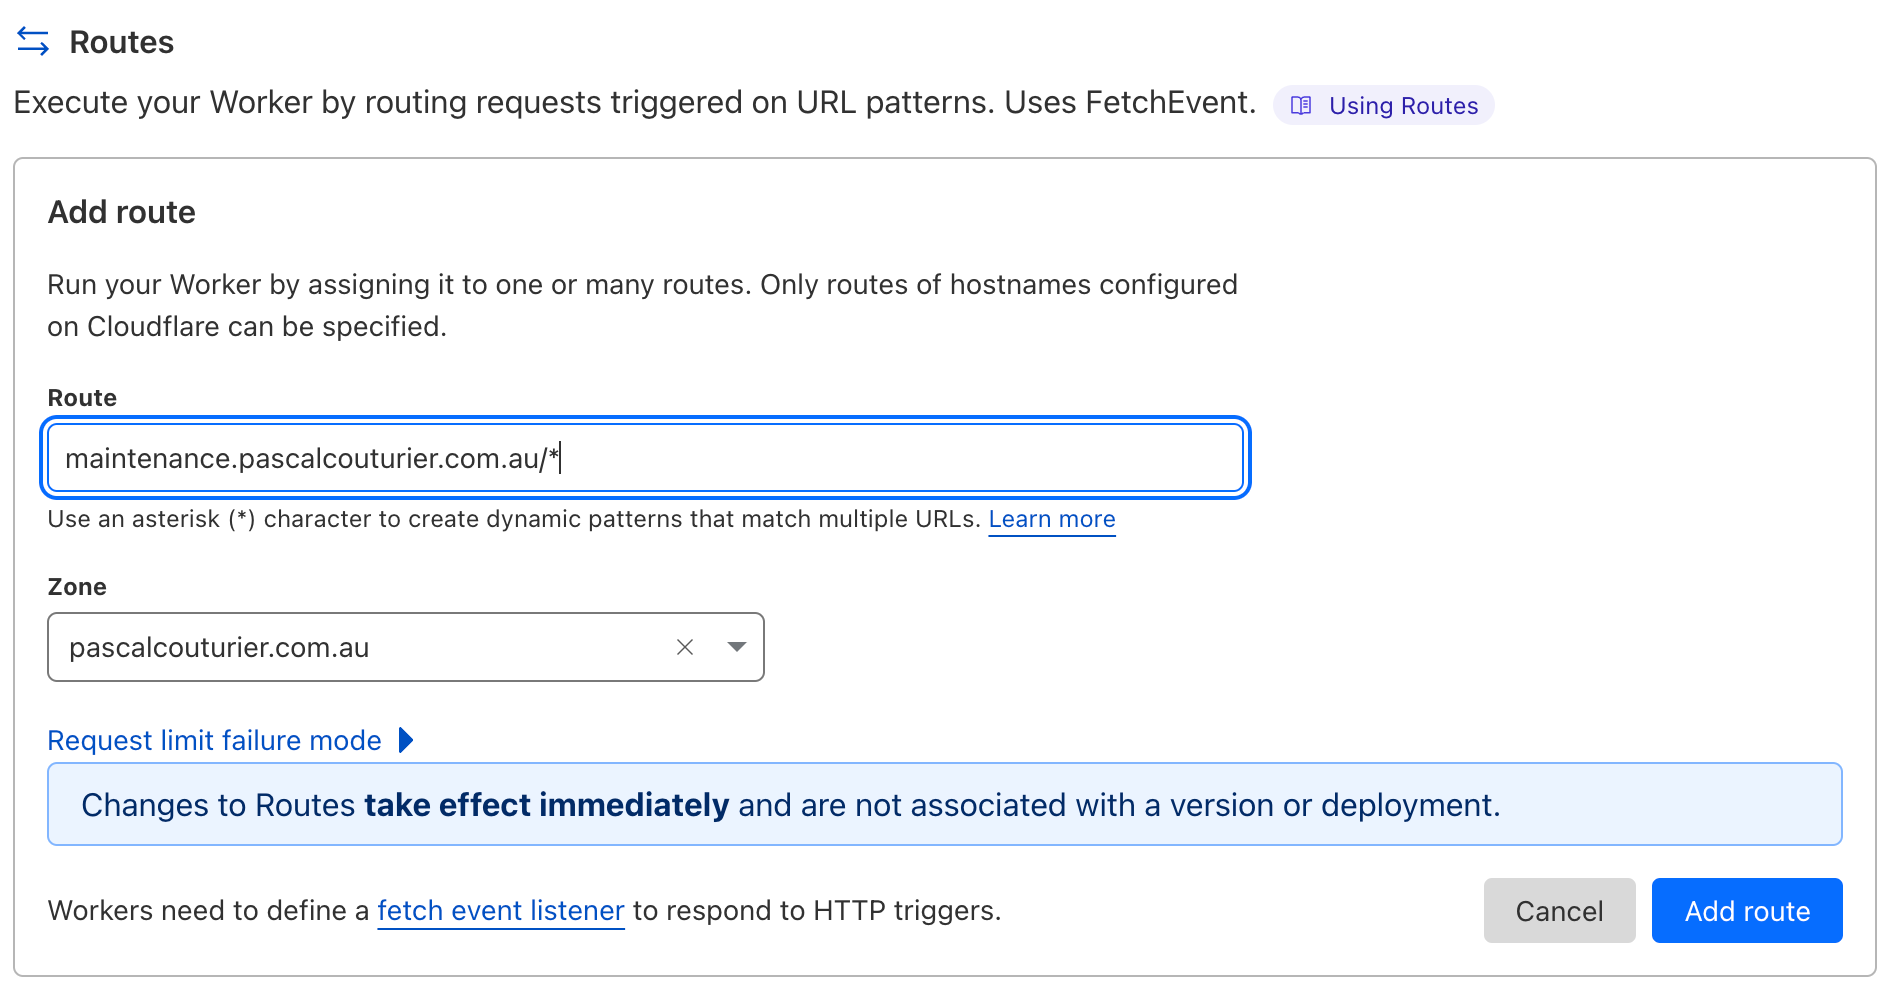
Now we have our worker created with a maintenance landing page, we need to configure the triggers to watch for specific url patterns. in my example I’m using the route `maintenance.pascalcouturier.com.au` url so it makes it easy for me to know that this is specific for the maintenance page on the domain pascalcouturier.com.au domain… this will make it easier to manage.
So, let’s go to the Settings tab on the newly created worker and select the Triggers option. From here we can select the Add route button.
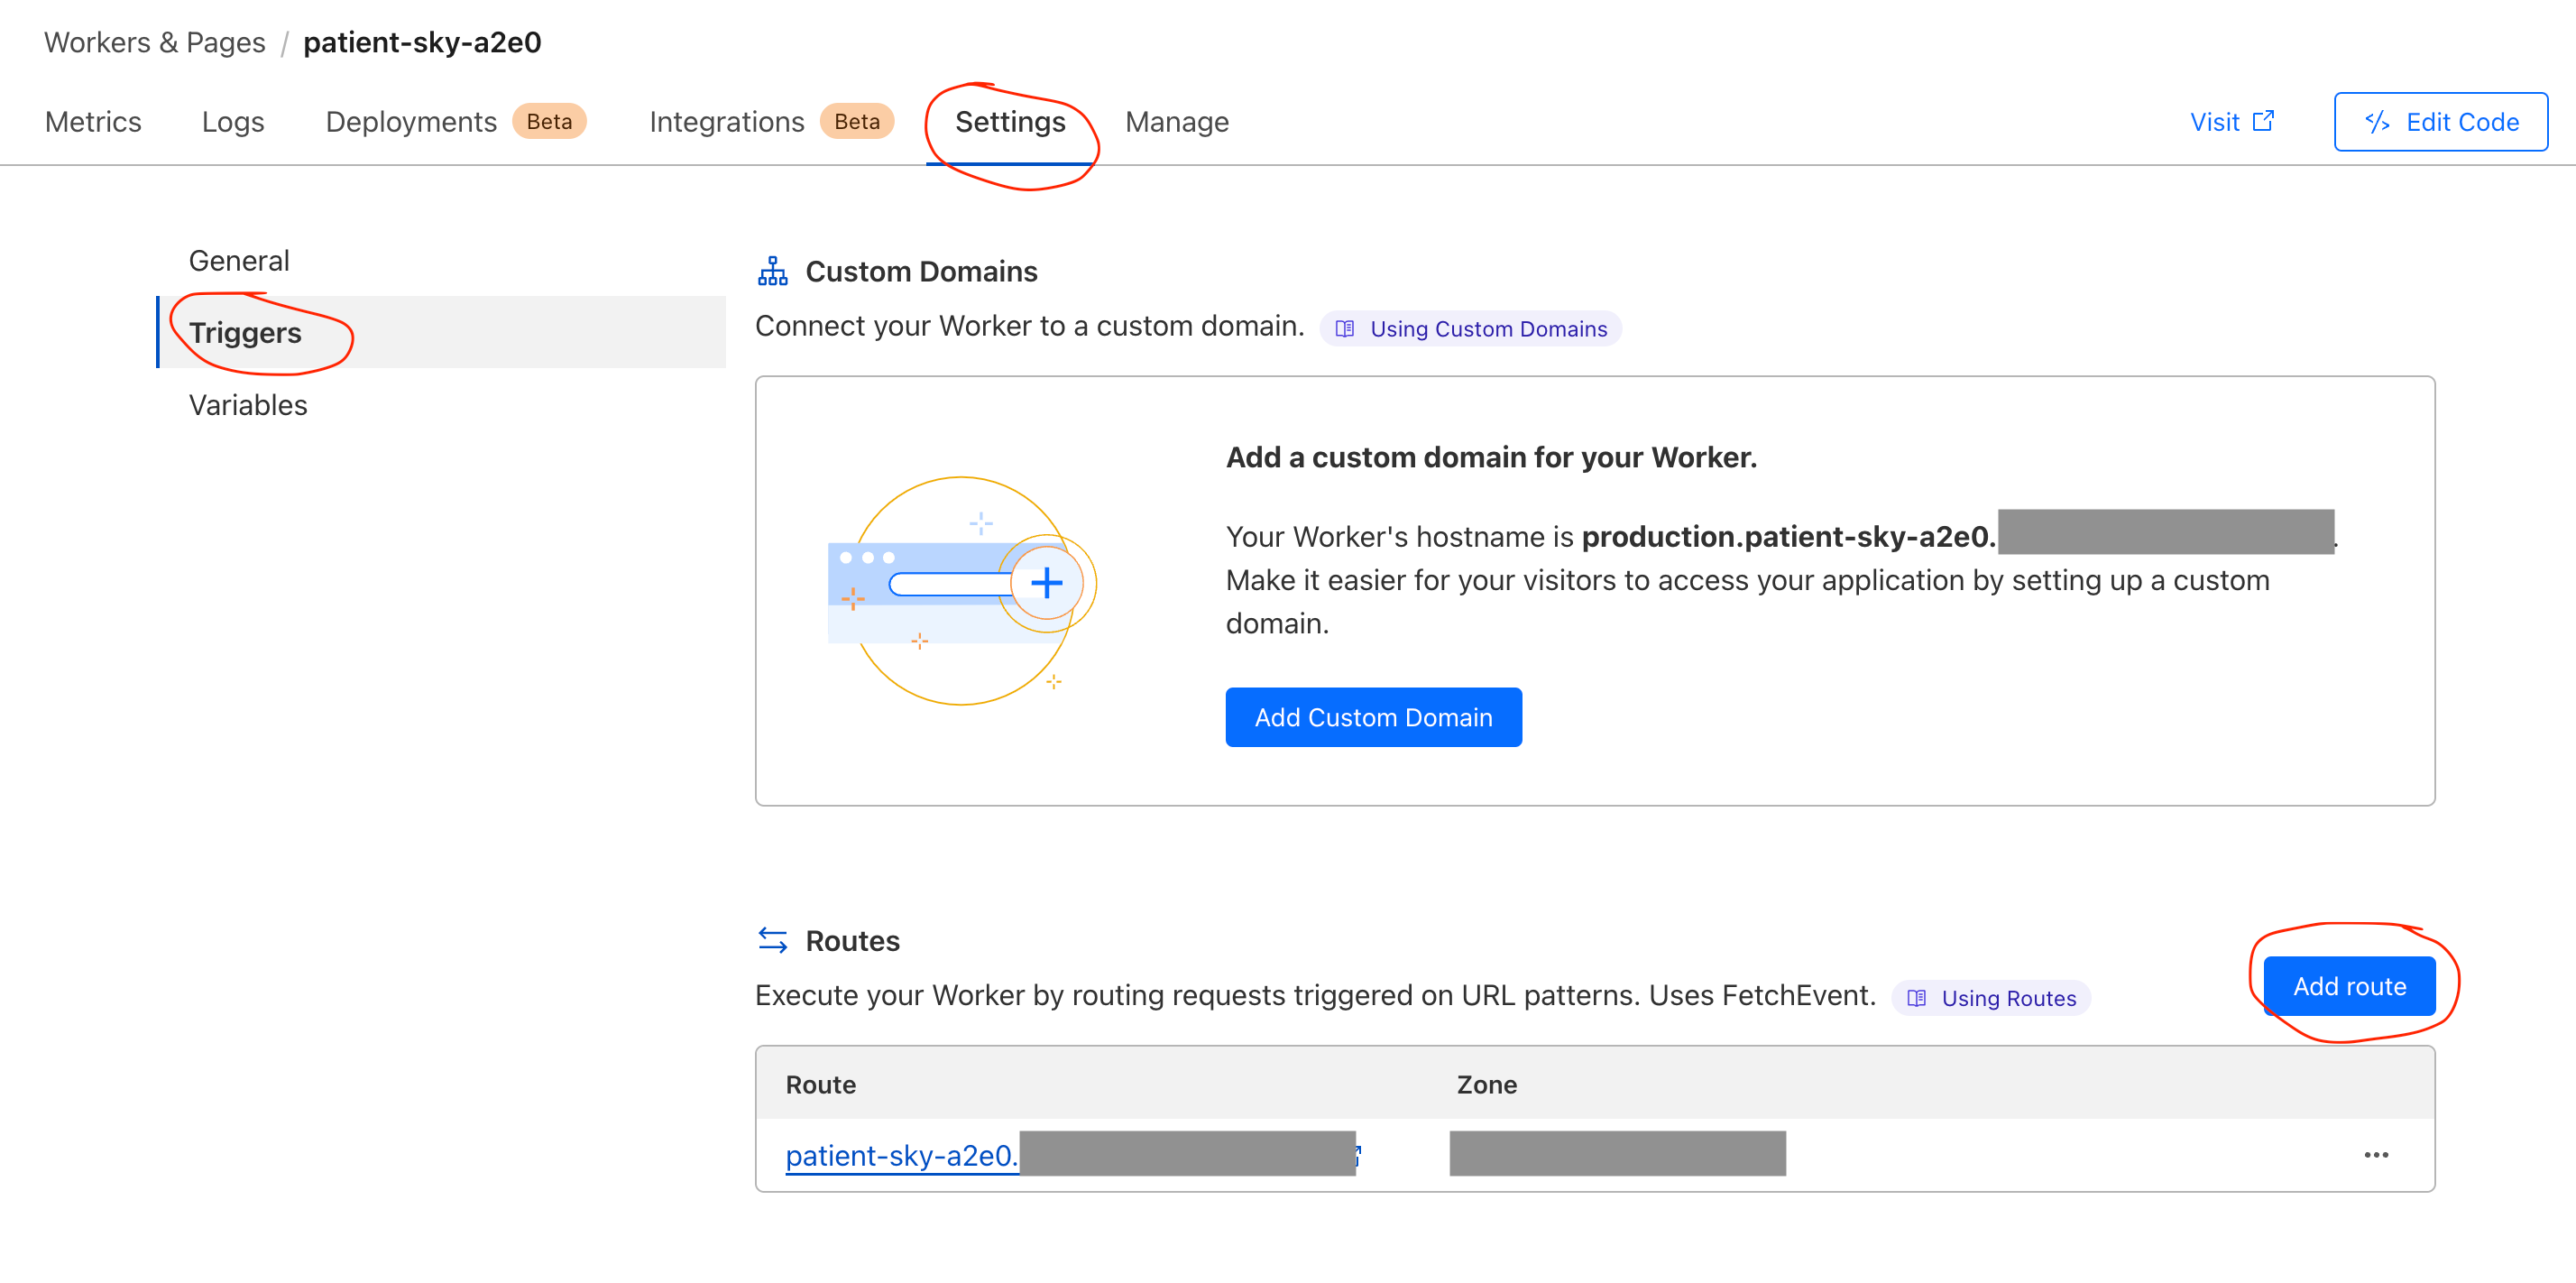
This will allow you to add the route, which I’ve used an asterisk so that it will pick up any path that is associated with the domain.
Also select the Zone it relates to which should be your domain and then Add route, this will now display the route along with the original one for the worker zone.
There we go, the worker has been setup and is ready to kick off, however we need to configure the triggers for it.
Attain required credentials
There are a few things we need to be able to call the triggers to turn on and turn off the maintenance messages when we require them.
Your Cloudflare email
Cloudflare Global API key
I’ve tried with using the API Tokens with various permissions, however I constantly get the unauthorised response, I prefer to use them over the Global API key. If anyone has details on correct Permissions setup with API Tokens instead I would recommend that and please share.
Zone ID
Route ID
Cloudflare Email
This is the easiest of them all, the email you use for your Cloudlfare login.
Global API Key
This can be found under your User Profile (My Profile) under the API Tokens section within the API Keys
*NOTE: It’s preferable to use the API Tokens instead of the Global token if you can
Zone ID
The Zone ID can be found on the right hand side of the Overview page for the site you want to manage, just scroll down a little and under API there should be the zone ID that you can copy.
Route ID
This one is probably the trickiest to get, as you need to use an api call to return the route ID for the worker. You can use a curl request to attain it like the below, make sure you populate it with your details:
curl -X GET "https://api.cloudflare.com/client/v4/zones/ZONE-ID/workers/routes/" \
-H "X-Auth-Email: YOUR@CLOUDFLARE-EMAIL.com" \
-H "X-Auth-Key: YOUR-API-KEY"
And you should get a response like this:
{
    "result": [
        {
            "id": "ROUTE_ID",
            "pattern": "maintenance.pascalcouturier.com.au/*",
            "script": "patient-sky-a2e0",
            "environment": "production",
            "request_limit_fail_open": false
        }
    ],
    "success": true,
    "errors": [],
    "messages": []
}
*NOTE: The id in the response will return the actual ID value
Trigger Worker
Now we have all we need to trigger the worker to turn on and off the maintenance message.
Turn on message
To turn on the message you can now use the below curl request, make sure you update the required details to match your request:
curl --location --request PUT 'https://api.cloudflare.com/client/v4/zones/ZONE-ID/workers/routes/ROUTE-ID' \
--header 'X-Auth-Email: YOUR@CLOUDFLARE-EMAIL.com' \
--header 'X-Auth-Key: YOUR-API-KEY' \
--header 'Content-Type: application/json' \
--data '{"pattern":"PATTERN-TO-LIVE-SITE","script":"SCRIPT-NAME"}'
This is very similar to the details we have before, apart from it being a PUT request and the data value that contains:
PATTERN-TO-LIVE-SITE: This is the production and non maintenance site, so in our example we would use pascalcouturier.com.au/*
SCRIPT-NAME: This is the name of the script/worker, in our example it would be patient-sky-a2e0
Turn off message
This is the same as the turn on request, however the pattern is different to match that of the maintenance page we used for the add route of the worker earlier.
curl --location --request PUT 'https://api.cloudflare.com/client/v4/zones/ZONE-ID/workers/routes/ROUTE-ID' \
--header 'X-Auth-Email: YOUR@CLOUDFLARE-EMAIL.com' \
--header 'X-Auth-Key: YOUR-API-KEY' \
--header 'Content-Type: application/json' \
--data '{"pattern":"PATTERN-TO-MAINTENANCE-SITE","script":"SCRIPT-NAME"}'
PATTERN-TO-MAINTENANCE-SITE: so in our example here this would be maintenance.pascalcouturier.com.au/*
Scripts and deployments
Now that we have the requests to turn on and off the messages we can trigger it whenever we like to switch the messages on and off.
We can convert these curl requests into scripts that can be run at specific points or remotely to trigger these calls now.
When doing deployments, which can be automatically triggered and run, we can set as a stage to trigger the maintenance message script to run and turn on the message at the start of the deployment and then at the end of the deployment turn the message off again automatically when all completed successfully.
I’m not going to go into the scripts and deployment into detail here, I may look at doing another post on deployment triggers and scripts, but it’s super helpful to not have to worry about turning on and off the maintenance message manually and having it all automated.
Resources:
I found some helpful articles on how to set this up on my search and wanted to reference them just in case you wanted a little bit more info on the process:
Summary
Now you have been able to create a fully custom Maintenance landing page for your site when you need to trigger and update or changes and allow users to know when and what is happening to your site.
This makes it very easy to update and redirect your site without having to deploy any changes to your existing site.
I hope this helps in your deployments and site updates in the future.
Until next time, happy Dev-ing peeps :)